Sub Zero refrigerator repair knowledge can save both time and money when issues arise, even though these appliances are renowned for their exceptional quality, cutting-edge technology, and luxurious design. These high-end units are a significant investment for many homeowners, ensuring that food is stored at optimal temperatures while maintaining the highest standards of freshness and flavor. However, even the most reliable appliances can encounter problems over time. Understanding how to repair these sophisticated units is essential for their upkeep.
When faced with a malfunctioning Sub Zero fridge, it is crucial to accurately diagnose the problem before attempting any repairs. Common issues can range from temperature fluctuations to unusual noises, and knowing how to identify these signs will streamline the repair process. This article aims to provide detailed guidance on diagnosing and fixing prevalent problems with Sub Zero refrigerators, enabling you to restore your appliance to its original functionality.
Emphasizing the importance of following proper repair procedures, this guide will cover essential tips, tools, and techniques needed to address specific issues with Sub Zero refrigerators. By equipping yourself with the right knowledge and skills, you can ensure your high-end appliance serves you well for years to come. From simple troubleshooting steps to more advanced repair methods, learn how to tackle any challenge your Sub Zero fridge presents with confidence.

Sub Zero Refrigerator Repair: How to Repair High-End Sub Zero Fridges
Sub Zero refrigerators are known for their exceptional quality and advanced technology. However, like any appliance, they may require repair over time. To effectively diagnose and repair common issues, follow these steps.
Identifying Common Problems
Begin by recognizing the signs that indicate your Sub Zero fridge needs repair. Common issues include improper cooling, unusual noises, door seal issues, or water leaks. It’s crucial to monitor performance and temperature settings to pinpoint the problem.
Check the temperature controls. If the refrigerator fails to maintain the desired temperature, verify that the settings are correct and that the condenser coils are clean. Dust and debris can hinder performance. Regularly cleaning the coils can prevent overheating and prolong the appliance’s life.
Basic Repair Techniques
For minor repairs, some tasks can be performed without professional help. If the refrigerator is not cooling, inspect the evaporator fan and the compressor. If the fan is blocked or malfunctioning, it can be replaced easily. Always unplug the unit before attempting any hardware changes.
If you notice water pooling inside or underneath the fridge, check the defrost drain for clogs. Clear any obstruction to ensure proper drainage. Additionally, inspect the door seals for cracks or wear, which can affect the refrigerator’s efficiency. Replacing worn seals can help maintain optimal temperatures.
For complex issues, such as electronic malfunctions or significant mechanical problems, it’s advisable to contact a certified Sub Zero technician. Attempting to repair intricate components without expertise may lead to further damage.
In conclusion, maintaining a Sub Zero refrigerator involves regular monitoring and minor repairs, while more complex issues should be handled by professionals to ensure the longevity and performance of your high-end appliance.
Identifying Common Issues in Sub Zero Refrigerators
Recognizing the typical problems that may arise in Sub Zero refrigerators is essential for timely repair and maintenance. High-end models, while known for their reliability, can still develop issues over time. The following are common problems faced by Sub Zero refrigerator owners.
Temperature Fluctuations
Temperature inconsistencies are one of the most frequently reported issues. These fluctuations can lead to food spoilage and affect the overall efficiency of the unit. Common causes include:
- Dirty condenser coils
- Faulty door seals
- Malfunctioning thermostat
Unusual Noises
Strange sounds such as banging, clicking, or humming can indicate underlying problems. Possible sources of these noises include:
- Compressor issues
- Fan problems
- Obstructed defrost drain
| Issue | Possible Cause | Recommended Action |
|---|---|---|
| Temperature Fluctuations | Dirty coils, faulty seals, bad thermostat | Clean coils, inspect seals, test thermostat |
| Unusual Noises | Compressor, fan, defrost drain | Check compressor condition, fan operation, clear drain |
| Water Leakage | Clogged defrost drain, damaged water line | Clear drain, inspect water line |
| Ice Build-up | Faulty defrost heater | Test and replace defrost heater |
By identifying these common issues promptly, Sub Zero refrigerator owners can ensure their units operate efficiently and can avoid more extensive repairs in the future.

Tools Needed for Sub Zero Refrigerator Repair
When addressing repairs on high-end Sub Zero refrigerators, it’s crucial to have the appropriate tools at hand. Proper equipment not only facilitates the repair process but also ensures that the appliance is handled correctly. Below is a list of essential tools you should have for Sub Zero refrigerator repair:
- Screwdrivers: A set of flathead and Phillips screwdrivers in various sizes is necessary for removing screws and panels.
- Nut Drivers: These are vital for loosening and tightening nuts that are commonly found in Sub Zero models.
- Multi-meter: A digital multi-meter is essential for diagnosing electrical issues, checking voltage, and testing continuity.
- Amp Meter: Useful for measuring current draw in compressor and other electrical components.
- Refrigerant Gauge Set: Necessary for checking refrigerant levels and pressure in the cooling system.
- Wrench Set: Both metric and standard wrenches will be required for various bolts and fittings.
- Flashlight: A strong, portable flashlight will help illuminate dark compartments for better visibility during the repair.
- Plumber’s Tape: This tape can be helpful for sealing connections to avoid leaks in water lines.
- Pliers: A variety of pliers, including needle-nose and channel locks, will assist with gripping and twisting tasks.
- Torpedo Level: Ensures that the refrigerator is level for optimal operation.
- Vacuum Pump: Important for evacuating the system before recharging refrigerants.
In addition to these tools, having a repair manual specific to the Sub Zero model being serviced is also advisable. This guide will streamline the repair process by providing detailed diagrams and diagnostic procedures tailored to Sub Zero appliances.
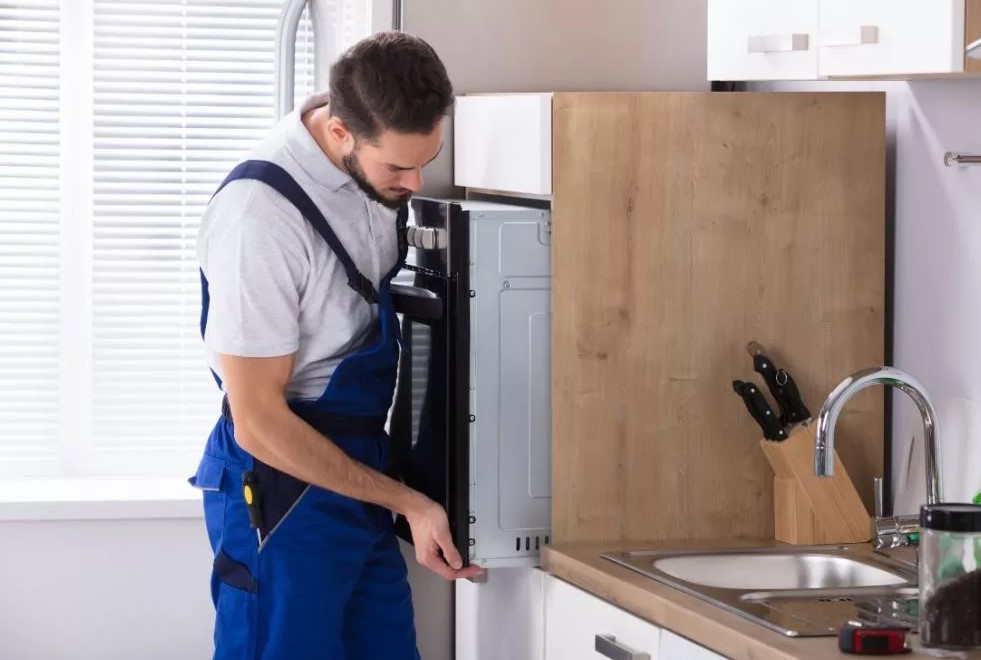
How to Access the Interior Components Safely
Accessing the interior components of a Sub Zero refrigerator requires a careful approach to ensure safety and prevent damage. Begin by unplugging the refrigerator to eliminate any electrical hazards. This step is crucial as it protects you from electric shocks during the repair process.
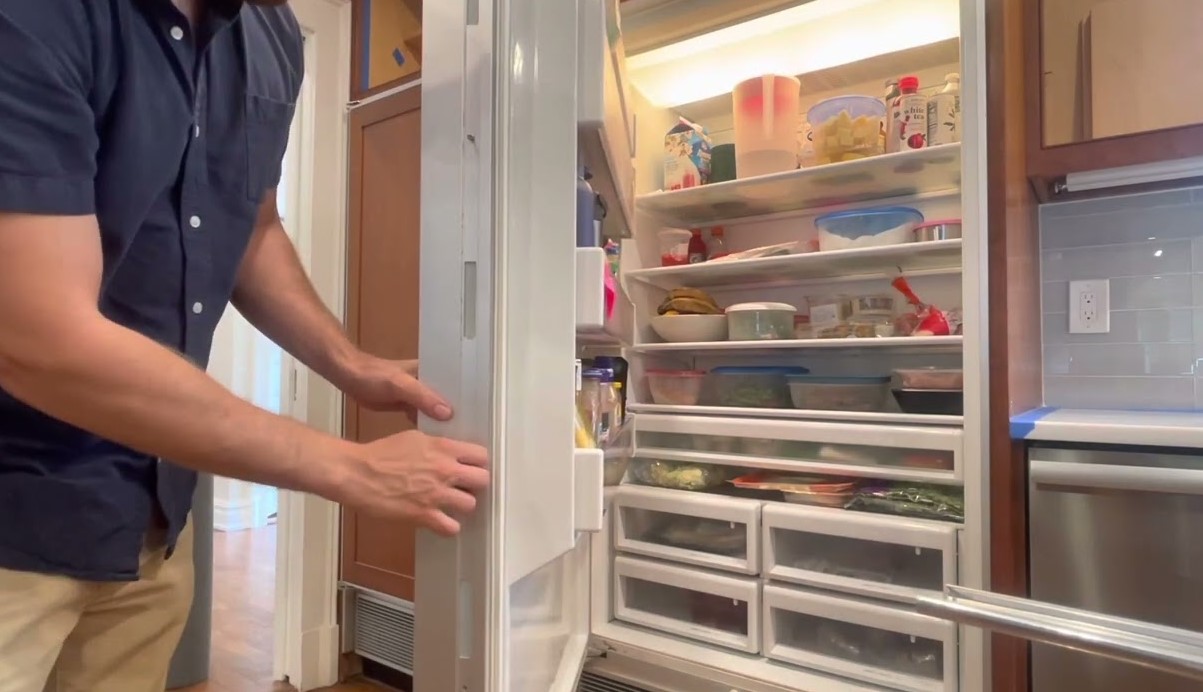
Next, remove all food items and shelves from the refrigerator and freezer sections. This not only provides ample space to work but also prevents any food spoilage while the unit is disassembled. Store perishable items in a cooler to maintain their freshness.
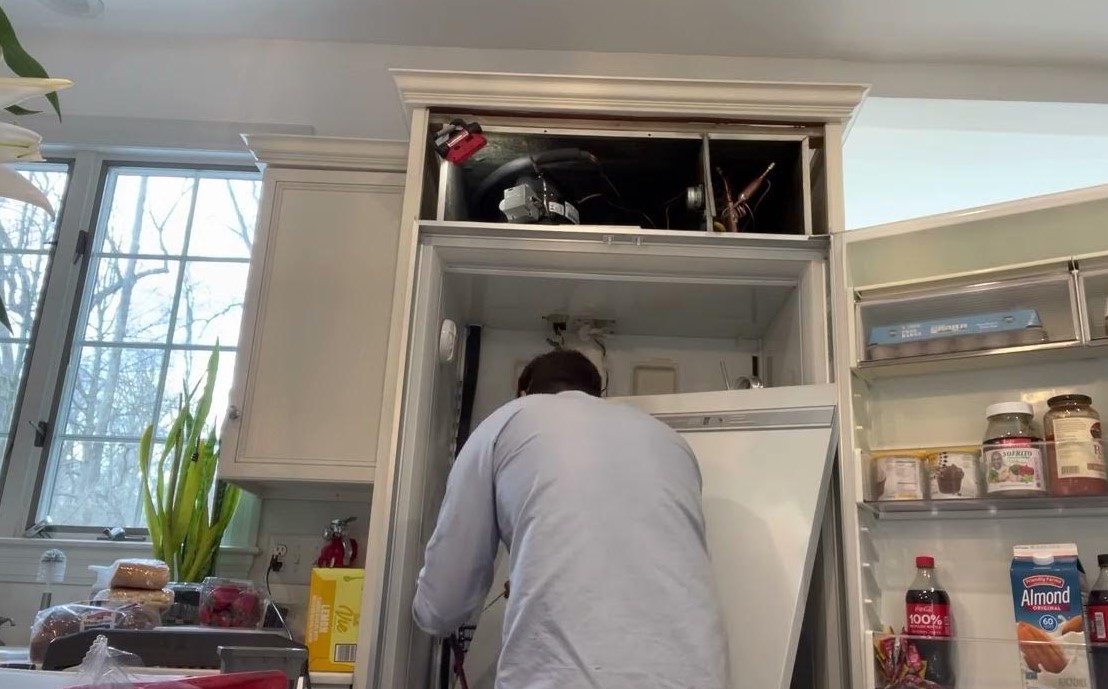
Removing the Exterior Panels
Examine the exterior of your Sub Zero fridge for screws or fasteners that secure the panels. Typically, you will find them at the back or sides of the appliance. Use a screwdriver or a nut driver to carefully unscrew and remove these fasteners. Keep them in a small container for easy retrieval during reassembly.
Once the fasteners are removed, gently pull the exterior panels away from the unit. Be mindful of any wiring or connections that may be attached to the panels. If necessary, take pictures of the wiring layout for reference during the reassembly process.
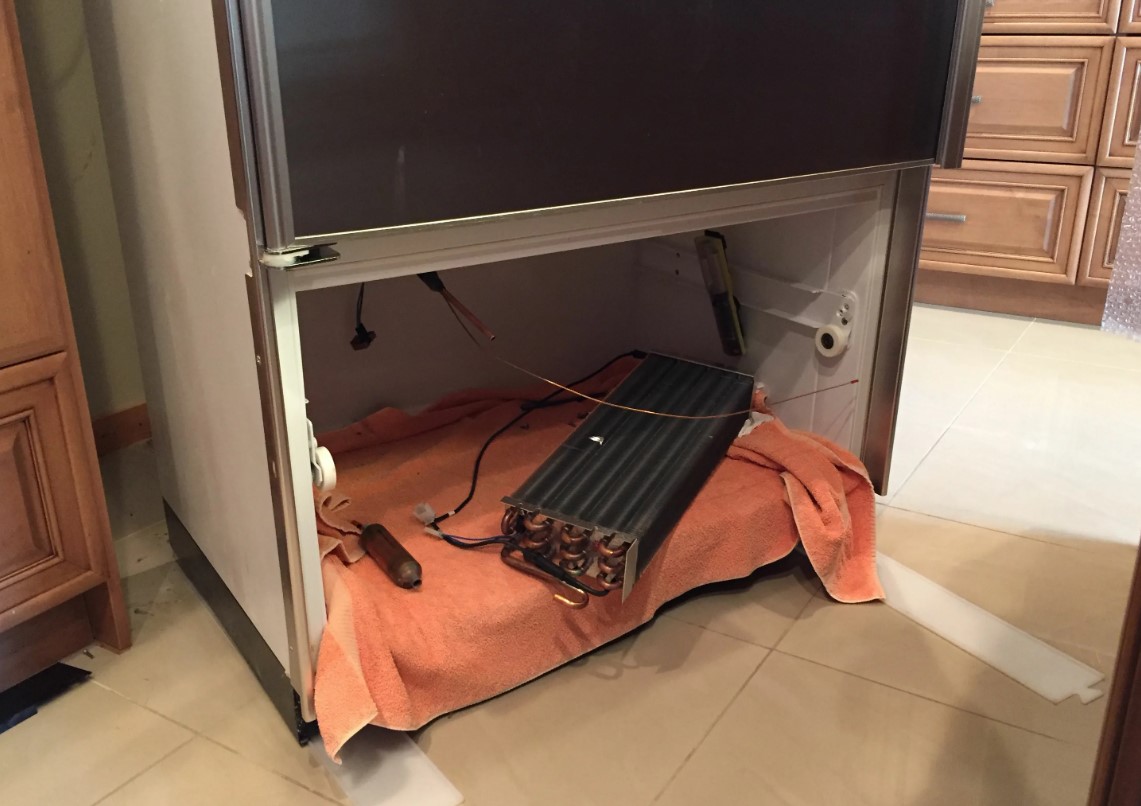
Accessing Internal Components
With the exterior panels removed, you will have access to essential components such as the compressor, condenser, evaporator fan, and more. Prioritize your safety by ensuring that all electrical connections are intact and not frayed. Avoid using metal tools near the compressor or wiring harnesses, as this could cause damaging electrical shorts.
If you need to remove specific components for repair, document their positions and connections. Use a digital camera or your mobile device to take clear photos. This will make reinstallation easier and help you avoid connection errors. Always refer to the user manual for guidance on the specific layout and components of your model.
By following these steps, you can safely access the interior components of your Sub Zero refrigerator for maintenance or repair, ensuring it operates efficiently for years to come.
Troubleshooting Cooling Problems in Sub Zero Units
When addressing cooling issues in Sub Zero refrigerators, the first step is to ensure that the unit is powered on and functioning. Check the power supply by inspecting the electrical outlet and the power cord for any signs of damage. If the unit is not receiving power, this could be the root of the cooling problem.
Next, examine the temperature settings on the control panel. Ensure that the temperature is set to the desired level for both the refrigerator and freezer compartments. If the settings are correct, but the cooling issues persist, consider performing a manual reset by unplugging the refrigerator for a few minutes before plugging it back in.
Another common cause of cooling problems is inadequate airflow. Check that the vents inside the refrigerator and freezer are not blocked by food items, which can restrict air circulation. Additionally, inspect the door seals for any damage or debris. Damaged seals can cause warm air to enter the unit, affecting its cooling efficiency. Clean the seals with warm, soapy water to ensure a tight closure.
Inspect the condenser coils located at the back or beneath the unit. Dust and debris accumulation on these coils can hinder their ability to dissipate heat, leading to cooling issues. Regularly clean the coils with a vacuum or a brush to maintain optimal performance.
If the compressor is running continuously or not at all, it could signify a more serious issue. Listen for any unusual noises, which may indicate a malfunctioning compressor or evaporator fan. If you suspect a fault, it is advisable to consult a professional technician for diagnosis and repair.
Finally, check for error codes displayed on the control panel, which can provide insight into specific issues. Refer to the Sub Zero user manual for guidance on interpreting these codes and following appropriate troubleshooting steps. If all else fails, consider contacting a certified Sub Zero repair service to address complex cooling problems.
Repairing or Replacing the Compressor on Sub Zero Fridges
The compressor is a crucial component of Sub Zero refrigerators, responsible for circulating the refrigerant and maintaining the desired temperature. If your fridge is making unusual noises, not cooling effectively, or showing error codes, it may be time to address the compressor. Understanding whether to repair or replace the compressor can save time and money in the long run.
Signs Indicating Compressor Issues
Before proceeding with repair or replacement, identify the signs of a failing compressor. Common indications include inconsistent temperatures, frost buildup in the freezer, and noticeable noise from the compressor unit. Additionally, if you notice the compressor running continuously without cycling off, it signals a potential problem. Conducting a visual inspection can also help; check for refrigerant leaks around the compressor area. If you confirm issues, it’s essential to act promptly to prevent further damage.
Repair vs. Replacement: What to Consider
When deciding between repairing or replacing the compressor, several factors must be considered. First, assess the age of your refrigerator. If it is relatively new, repairing the compressor might be a viable option. However, if the unit is older and has had multiple repairs, replacement could be more cost-effective. Additionally, consider the overall condition of the fridge and the warranty status, as a warranty may cover some repair costs. Weighing the repair costs against the price of a new compressor is crucial. Consult with a professional technician to evaluate the best course of action, as they can provide insights based on your specific model and the nature of the issues observed.

Fixing Defrosting Issues in Sub Zero Models
Defrosting issues in Sub Zero refrigerators can lead to inadequate cooling and spoilage of stored food. Identifying and addressing these problems promptly is crucial for maintaining optimal performance.
Here are the common causes of defrosting issues and solutions to rectify them:
- Clogged Drain Line:A blocked drain can prevent water from flowing out of the refrigerator during the defrost cycle.
- Locate the drain hole, usually at the bottom of the refrigerator or near the evaporator.
- Use warm water or a solution of vinegar and water to clear the blockage.
- Ensure that the drain pan is clean and properly positioned.
- Faulty Defrost Timer:If the defrost timer is defective, the heater may not activate during the defrost cycle.
- Access the timer by removing the cover panel.
- Check for continuity using a multimeter; replace if necessary.
- Damaged Defrost Heater:A damaged defrost heater won’t melt accumulated frost.
- Inspect the defrost heater for any visible damage or discoloration.
- Test for continuity; replace it if it fails the test.
- Malfunctioning Thermostat:The defrost thermostat monitors the temperature of the evaporator coils.
- Locate the thermostat within the unit and check its functionality.
- Use a multimeter to confirm continuity; replace if not functioning properly.
Regular maintenance of your Sub Zero refrigerator can prevent defrosting issues effectively. Cleaning coils, checking door seals, and ensuring proper ventilation can enhance overall performance and diminish the likelihood of future problems.
Replacing the Door Seal on Sub Zero Refrigerators
Replacing the door seal on Sub Zero refrigerators is a crucial maintenance task that ensures the appliance operates efficiently. A damaged or worn door seal can lead to temperature fluctuations, increased energy consumption, and food spoilage. Here’s how to replace the door seal effectively.
Tools and Materials Needed
- New door seal (specific to your Sub Zero model)
- Screwdriver (usually Phillips or flathead)
- Hairdryer or heat gun
- Soap and water solution
- Clean cloth
Step-by-Step Instructions
- Remove the Old Seal: Start by opening the refrigerator door. Carefully inspect the existing seal. If it is damaged, gently pull it away from the door frame. You may need to unscrew any retaining screws that hold the seal in place.
- Clean the Surface: Use a soap and water solution to clean the area where the seal attaches. Remove any grime, debris, or old adhesive that may remain on the door.
- Prepare the New Seal: Unbox the new seal and inspect it for damages. If it is rigid, use a hairdryer or heat gun on a low setting to soften the material, making it easier to install.
- Attach the New Seal: Align the new seal with the door frame. Press it into place, ensuring it fits snugly. If your model requires screws, secure the seal with the screws you previously removed.
- Test the Seal: Close the refrigerator door and check if the seal is tight by performing a dollar bill test. The bill should not slide out easily when the door is closed. If it does, adjust the seal accordingly.
- Final Checks: Allow the refrigerator to run for a few hours to ensure the new seal is functioning properly. Monitor for any air leaks or temperature irregularities.
Regularly checking and replacing the door seal can prolong the life of your Sub Zero refrigerator and optimize its performance. If you encounter any issues during the process, consult your user manual or contact a professional technician for assistance.
Understanding the Electrical System of Sub Zero Fridges
The electrical system of Sub Zero refrigerators is a sophisticated network designed to ensure optimal performance and energy efficiency. At the core of this system is the main control board, which regulates all refrigerator operations, including temperature control, defrost cycles, and fan management. Understanding the components and functions of this electrical system is crucial for effective troubleshooting and repair.
Main Control Board
The main control board acts as the brain of the refrigerator. It receives inputs from various sensors and devices, including temperature sensors and door switches, and processes this information to maintain the desired internal conditions. If the refrigerator is not cooling properly, it may be a sign of a malfunctioning control board. Testing for continuity and inspecting for burnt components or loose connections can help determine if the board needs replacement.
Temperature Sensors and Defrost Systems
Sub Zero fridges utilize multiple temperature sensors to monitor the internal environment accurately. These sensors inform the control board about the current temperature, enabling precise adjustments. Additionally, the defrost system is vital in preventing frost buildup, which can hinder performance. It consists of a defrost timer, heater, and terminating thermostat. If frost appears on the evaporator coils, it may indicate an issue with the defrost components. Regular inspection and testing of these parts are essential to maintain the efficacy of the refrigeration system.
How to Clean the Condenser Coils Effectively
Cleaning the condenser coils of your Sub Zero refrigerator is essential for maintaining optimal performance and energy efficiency. Dust and debris can accumulate on the coils, leading to overheating and potential breakdowns. Follow the steps below for effective cleaning.
Tools You Will Need:
- Soft brush or coil cleaning brush
- Vacuum cleaner with a brush attachment
- Cloth or rag
- Replacement gloves (optional)
Step-by-Step Cleaning Process:
- Power Off: Before starting, unplug the refrigerator from the wall outlet to ensure safety.
- Locate the Coils: Depending on the model, the condenser coils may be located at the back or beneath the fridge.
- Initial Dust Removal: Use the vacuum cleaner with a brush attachment to gently remove loose dirt and debris from the coils.
- Brush the Coils: Take the soft brush or coil cleaning brush and carefully scrub the coils to dislodge any stubborn dust. Be gentle to avoid damaging the coils.
- Final Cleanup: Wipe the area around the coils with a cloth to remove any remaining particles. This helps prevent future buildup.
- Reconnect Power: Once cleaning is complete, plug the refrigerator back in and allow it to operate as usual.
Cleaning Frequency: It is recommended to clean the condenser coils every six months, or more frequently if you have pets or a dusty environment.
| Cleaning Frequency | Description |
|---|---|
| Every 6 months | Standard cleaning schedule for optimal performance. |
| Every 3 months | Recommended for homes with pets or higher dust accumulation. |
Regular maintenance of condenser coils will enhance the efficiency of your Sub Zero refrigerator, prolong its lifespan, and potentially reduce energy costs.
Diagnosing and Fixing Ice Buildup Problems
Ice buildup in your Sub Zero refrigerator can lead to inefficient cooling and potential damage to the unit. The first step in addressing this issue is to identify the underlying cause. Common reasons for ice accumulation include a malfunctioning defrost heater, blocked ventilation, or issues with door seals.
Start by checking the defrost heater. This component is vital for melting frost that accumulates on the evaporator coils. Use a multimeter to test for continuity. If the heater is defective, it should be replaced to restore proper function.
Next, inspect the refrigerator’s ventilation system. Ensure that vents are not blocked by food items, as this can restrict airflow and contribute to ice formation. Clean the air ducts and ensure there is enough space around the fridge for proper circulation.
Evaluating the door seals is equally important. Worn or damaged seals can allow warm air to enter the refrigerator, leading to condensation and ice buildup. Perform a visual inspection and a simple dollar bill test: close the door on a bill and try to pull it out. If it slides out easily, the seals may need replacement.
Lastly, check the temperature settings of your Sub Zero fridge. Keeping the temperature too low can lead to excessive frost. Adjust the thermostat to the recommended setting, usually between 34°F and 40°F (1°C to 4°C).
If the problem persists after addressing these issues, professional service may be required to diagnose more complex problems such as a malfunctioning thermostat or compressor issues. Regular maintenance can prevent future occurrences, ensuring optimal performance of your high-end appliance.
Calibrating Temperature Settings in Sub Zero Units
Calibrating the temperature settings of your Sub Zero refrigerator is essential to ensure optimal performance and food preservation. Incorrect temperatures can lead to spoilage or inefficient energy use. Follow these steps for accurate calibration.
Accessing the Control Panel
Begin by locating the control panel on your Sub Zero unit. This panel can typically be found inside the refrigerator compartment on the right side. Press the «Menu» or «Settings» button to enter the configuration mode. This will allow you to view the current temperature settings for both the refrigerator and freezer compartments.
Adjusting Temperature Settings
Once you’ve accessed the control panel, note the default temperature settings, which are usually around 37°F (3°C) for the refrigerator and 0°F (-18°C) for the freezer. To recalibrate, use the temperature adjustment buttons: «+» to increase and «-» to decrease the temperature as required. Wait for a few seconds after making your adjustments to confirm the changes. After setting the new values, it’s advisable to monitor internal temperatures using an appliance thermometer to ensure they align with your adjustments.
Always allow 24 hours for the unit to stabilize its temperature after making adjustments before re-evaluating. If inconsistencies persist, consult the manufacturer’s support documentation or consider contacting a professional technician for further assistance.
Maintaining Your Sub Zero Refrigerator for Longevity
To ensure the longevity and optimal performance of your Sub Zero refrigerator, regular maintenance is crucial. Here are some essential maintenance tips to keep your high-end appliance running smoothly:
- Clean the Condenser Coils: Dust and debris can accumulate on the condenser coils, impacting cooling efficiency. Clean the coils at least twice a year using a vacuum or a coil brush.
- Check the Door Seals: Inspect the door seals regularly for cracks and tears. Damaged seals can lead to temperature fluctuations and increased energy consumption. Replace any worn seals immediately.
- Level the Refrigerator: A refrigerator that is not level can affect its performance. Use a level to ensure your Sub Zero is properly positioned, adjusting the feet as needed.
- Maintain Optimal Temperature: Set the internal temperature to the manufacturer’s recommended settings (typically around 37°F for the refrigerator and 0°F for the freezer). This helps preserve food quality and energy efficiency.
- Defrost the Freezer: In models without automatic defrost, manually defrost the freezer when ice buildup exceeds a quarter of an inch to maintain efficiency.
- Replace Water Filters: If your model includes a water dispenser or ice maker, replace the water filter according to the manufacturer’s instructions, usually every 6 months.
- Regularly Inspect and Clean Interior: Keep the interior clean by wiping spillages immediately and organizing food to allow air circulation. Regular cleaning can prevent bacteria growth.
- Monitor for Unusual Noises: Listen for any strange sounds, which could indicate mechanical issues. Address these concerns promptly to avoid further damage.
By following these maintenance tips, you can extend the lifespan of your Sub Zero refrigerator, ensuring it remains a reliable and efficient kitchen appliance for years to come.
Q&A — Sub Zero refrigerator repair:
What are the common issues associated with Sub Zero refrigerators?
Sub Zero refrigerators can experience various common issues, including temperature fluctuations, water leaks, and strange noises. Temperature problems may arise due to a faulty thermostat, while water leaks can often be traced to clogged defrost drains or damaged door seals. If you hear unusual noises, it might indicate a malfunctioning compressor or evaporator fan. Regular maintenance can help prevent these issues from occurring.
How can I troubleshoot a Sub Zero refrigerator that is not cooling properly?
If your Sub Zero refrigerator is not cooling, first check the temperature settings to ensure they are set correctly. Next, inspect the door seals for any gaps that may be allowing cold air to escape. It’s also beneficial to clean the condenser coils, as dust buildup can impede cooling efficiency. If these steps don’t resolve the issue, there may be a problem with the compressor or the refrigerant levels, and you should consider contacting a technician.
Is it safe to repair my Sub Zero refrigerator myself?
While some minor repairs, like changing filters or cleaning coils, can be safely performed by homeowners, more complex issues are best handled by professionals. Working with electrical components or refrigerants can be hazardous without proper training and tools. If you’re unsure about a repair, it’s wise to consult a qualified technician to avoid damages or unsafe situations.
What maintenance tips can help extend the life of my Sub Zero refrigerator?
To extend the life of your Sub Zero refrigerator, regularly clean the condenser coils to prevent dust buildup, which can strain the appliance. Check and replace water filters as needed to ensure clean water and ice. Inspect door seals to ensure they are intact, as proper sealing helps maintain temperature. Additionally, it’s recommended to keep the fridge well-organized to allow for proper airflow around the items inside.
When should I consider calling a professional for Sub Zero refrigerator repairs?
If you experience recurring issues despite performing regular maintenance, or if your refrigerator is experiencing symptoms such as continuous running, unusual noises, or significant temperature variances that you cannot resolve, it’s time to call a professional. A technician can perform a thorough diagnosis and repair complex issues, preventing further damage to your appliance.
APPLIANCE REPAIR in California — fast, reliable, and affordable service that brings your home appliances back to life. Get expert help today and enjoy worry-free comfort!