In today’s fast-paced world, small household appliances play a crucial role in our daily lives, from coffee makers that jumpstart our mornings to toasters that conveniently brown our bread. However, when these devices malfunction, they can disrupt our routines and lead to frustration. With the right knowledge and tools, many common issues can be resolved without the need for costly repairs or replacements.
This DIY guide is designed to empower homeowners and renters alike, providing you with the essential skills needed to tackle small appliance repairs effectively. Understanding the basic components and functions of various appliances will help you diagnose problems accurately, saving both time and money.
From simple cleaning techniques to more complex troubleshooting steps, this article will cover a range of tips and tricks for fixing small appliances such as blenders, microwaves, and irons. Engaging in these repairs not only extends the life of your appliances but also fosters a sense of accomplishment and self-sufficiency.

Small Appliance Repair: DIY Guide to Fixing Small Household Appliances
Small appliances can significantly enhance our daily lives by making tasks more manageable. However, when these devices stop functioning, it can lead to frustration and unnecessary expenses. This guide provides you with practical steps to troubleshoot and repair common small household appliances.
Common Small Appliances and Their Issues
- Blenders: Issues often include not spinning, leaking, or making unusual noises.
- Toasters: Common problems are failing to heat or getting stuck in the down position.
- Coffee Makers: Issues may include not brewing, leaking water, or unusual noises during operation.
- Microwaves: Problems can include no power, uneven heating, or strange sounds.
Tools and Safety Precautions
Before starting any repairs, gather the necessary tools:
- Screwdriver set
- Multimeter
- Cleaning cloths
- Safety gloves
- Wire cutters or strippers
Always unplug the appliance before servicing it to avoid electric shock. Use proper tools and precautions to ensure safety during the repair process.
Step-by-Step Repair Process
- Identify the Problem: Observe the appliance to determine what is wrong. Refer to user manuals when available.
- Disassemble the Appliance: Carefully open the appliance using the appropriate screwdriver. Keep all parts organized.
- Check for Faulty Components: Use a multimeter to test electrical components such as switches and heating elements.
- Replace or Repair Parts: If you find any faulty parts, replace them. Search for replacement parts online or at local hardware stores.
- Clean the Appliance: Ensure that crumbs, dust, or other debris are removed. This can enhance performance and prolong the life of the appliance.
- Reassemble and Test: Carefully put the appliance back together and plug it in. Test to confirm the repairs were successful.
Using this guide, you can tackle minor repairs on small household appliances effectively. Regular maintenance and prompt repairs can save you time and money, extending the lifespan of your devices.
Identifying Common Small Appliance Issues
When dealing with small household appliances, identifying common issues is the first step in effective repair. Many problems can arise from simple user errors or minor malfunctions that can be easily fixed. Understanding these issues can save time, money, and resources.
1. Appliance Not Turning On
If an appliance fails to turn on, start by checking the power source. Ensure that the appliance is properly plugged in and that the outlet is functioning. A faulty outlet can be tested with a multimeter or by plugging in another device. If the outlet is working, inspect the power cord for damage or fraying, as this can prevent the appliance from receiving power. Some appliances have internal fuses that may blow and require replacement; consult the user manual for guidance.
2. Unusual Noises or Vibrations
Noisy operation is often a sign of mechanical failure. If you hear grinding, rattling, or excessive vibrations, there may be foreign objects or debris lodged within the appliance. Examples include blenders or food processors where food particles can disrupt the blades. In other cases, moving parts may need lubrication or adjustment. Inspecting these components and cleaning the appliance can help to resolve these issues.
Necessary Tools for Appliance Repair
Repairing small household appliances requires a specific set of tools to ensure efficiency and effectiveness. Having the right tools at your disposal can simplify the repair process, enabling you to troubleshoot and fix appliances with ease. Below are the essential tools you should consider having in your toolkit when embarking on appliance repairs.
Basic Tools
The foundational tools are vital for most repair tasks. Here’s a list of the basic tools you should have:
| Tool | Purpose |
|---|---|
| Screwdriver Set | Used to remove and tighten screws in various appliances. Having both flathead and Phillips head screwdrivers is essential. |
| Wrench Set | Necessary for loosening and tightening nuts and bolts. |
| Pliers | Helpful for gripping, twisting, and cutting wires or small components. |
| Utility Knife | Useful for cutting through insulating materials or packaging during repairs. |
Specialized Tools
In addition to basic tools, certain specialized tools may be required depending on the appliances you are repairing. These tools can make more complex repairs manageable:
| Tool | Purpose |
|---|---|
| Multimeter | Essential for diagnosing electrical issues by measuring voltage, current, and resistance. |
| Heat Gun | Used for shrinking tubing or loosening adhesives in repairs. |
| Socket Set | Provides various sizes for fastening screws and bolts, especially in compact spaces. |
| Magnetic Parts Tray | Keeps screws and small components organized, preventing loss during repairs. |
Equipping yourself with these necessary tools will enable you to handle a variety of repairs confidently, ensuring that both you and your appliances are in good hands.

Safety Precautions When Working with Electrical Appliances
When repairing small electrical appliances, maintaining safety is paramount. Always begin by ensuring the appliance is unplugged from the power source. This is the simplest yet most effective way to prevent accidental electrocution or short circuits during your repair process.
Use Proper Tools: Equip yourself with insulated tools specifically designed for electrical work. These tools minimize the risk of electrical shock and provide better grip and control while working on delicate components.
Wear appropriate personal protective equipment. Safety goggles can protect your eyes from debris during disassembly, while non-slip gloves offer added protection against electrical shocks. Avoid wearing jewelry that can conduct electricity or snag on components.
Ensure your workspace is dry and well-lit. Damp environments increase the risk of electric shock, while good lighting allows you to see small parts and details clearly. Avoid working in areas with moisture accumulation.
Check for Damage: Before starting any repair, inspect the appliance for visible signs of damage such as frayed cords, burn marks, or loose connections. Do not attempt to repair a damaged appliance; instead, replace or consult a professional.
Understand the appliance’s electrical specifications. Review the owner’s manual for detailed information about voltage and wattage to avoid using improper replacement parts. Mismatched components can lead to appliance failure and safety hazards.
While working, maintain a tidy environment. Clutter can lead to accidental contact with live wires or tools slipping off surfaces. Keep all tools organized and always return them to their designated place after use.
In case of any uncertainties, consult an experienced technician or refer to reliable repair resources. If at any point you feel overwhelmed or unsafe, it is advisable to seek professional assistance rather than risking injury.
After completing the repair, double-check all connections and perform a visual inspection before plugging the appliance back in. Test the appliance in a controlled manner to ensure it operates correctly without any issues.
By adhering to these safety precautions, you can significantly reduce the risks associated with repairing small electrical appliances and ensure a safer DIY experience.
Troubleshooting Techniques for Kitchen Blenders
When your kitchen blender stops working or underperforms, it can be frustrating, but many issues can be resolved with a bit of troubleshooting. Here are some common problems and their solutions.
1. Blender Won’t Turn On
If your blender doesn’t power up, consider the following:
- Check the power source: Ensure the blender is plugged in tightly to a working outlet. Test the outlet with another appliance if necessary.
- Inspect the cord: Look for any visible signs of damage on the power cord. A frayed or broken cord may need to be replaced.
- Examine the safety features: Some blenders have safety mechanisms that prevent operation if the lid is not secured properly. Ensure the lid is locked in place.
2. Blender Is Making Unusual Noises
If your blender is producing strange sounds, try these steps:
- Check for foreign objects: Turn off the blender and remove the jar to see if any utensils or other items have fallen into the base.
- Inspect the blades: Ensure that the blades are not damaged or obstructed. Blades can sometimes bend or get stuck, causing noise issues.
- Evaluate the motor: If the noise sounds like grinding, the motor may be failing. In this case, consult a professional for repairs.
By focusing on these common troubleshooting techniques, you can often diagnose and fix the issues affecting your kitchen blender, extending its lifespan and improving its performance.
Steps to Repairing a Faulty Toaster
If your toaster is not functioning properly, follow these steps to troubleshoot and repair it effectively.
1. Unplug and Disassemble
Before attempting any repairs, ensure the toaster is unplugged to prevent electrical shock. Carefully disassemble the toaster by removing screws from the base and any accessible components. Note the location of each part to facilitate reassembly.
2. Inspect for Damage
Examine the interior components, including the heating elements, wiring, and the timer mechanism. Look for signs of burn marks, broken wires, or any other physical damage. If any heating element appears to be damaged, it will need to be replaced.
Check the crumb tray and clean any accumulated crumbs or debris, as they can cause overheating or electrical issues. Reconnect or replace any loose wires or components, ensuring that connections are secure.
For toasters with a popping mechanism, test the lever switch to ensure it is functioning correctly. If it’s malfunctioning, it may need replacement.
3. Test and Reassemble
After repairs, reassemble the toaster by reversing the disassembly steps. Ensure all screws are tightened and components are correctly aligned. Plug in the toaster and perform a test run without bread to check if the heating elements activate as expected.
If the toaster operates correctly, conduct a final test with bread to ensure even toasting. If problems persist, further troubleshooting may be required, or it might be more economical to replace the toaster entirely.
How to Fix a Leaking Coffee Maker
A leaking coffee maker can cause inconvenience and mess. Identifying the source of the leak is essential to perform a proper fix. Follow this step-by-step guide to repair your coffee maker effectively.
Identify the Source of the Leak
First, examine the coffee maker to determine where the leak originates. Common areas include:
- The water reservoir
- The brew basket
- The carafe
- Water lines or connections
Fill the reservoir with water and observe the appliance during a brewing cycle. Check for dripping or pooling water beneath the machine.
Common Issues and Solutions
Once you’ve identified the leak’s source, consider the following common issues and their solutions:
1. Damaged Water Reservoir: If the reservoir has cracks or is warped, replace it with a new one. Many brands sell replacement parts online or at appliance stores.
2. Faulty Brew Basket: If the brew basket does not sit properly, adjust or replace it. Ensure that it clicks into place securely to avoid gaps where water can escape.
3. Clogged Water Lines: Mineral buildup can obstruct water flow, leading to leaks. Use a mixture of equal parts vinegar and water to clean the internal tubes. Run a brewing cycle with this solution, followed by several cycles of clean water.
4. Seals and Gaskets: Inspect seals and gaskets for wear or damage. If they appear worn out, replace them to create a proper seal and prevent leaks.
After applying these repairs, run a test cycle without coffee. Monitor for leaks during and after the cycle to ensure the issue has been resolved.
Diagnosing Problems with Electric Kettles
Electric kettles are popular household appliances known for their convenience in boiling water quickly. However, they can develop issues over time. To diagnose problems effectively, follow these steps.
First, check if the kettle is receiving power. Ensure that it is properly plugged in and the outlet is functioning. You can test the outlet by plugging in another device. If the kettle does not turn on, inspect the power cord for any visible damage or fraying, which may indicate a need for replacement.
If the kettle powers on but does not heat water, the thermostat may be malfunctioning. To test the thermostat, listen for the automatic shut-off feature; if it activates without boiling water, the thermostat might be defective. Using a multimeter, you can check for continuity in the thermostat circuit.
Another common issue is water taking too long to boil. This can result from limescale buildup, particularly in areas with hard water. Descale the kettle using a mixture of vinegar and water or a commercial descaling solution. If the problem persists, the heating element may be worn out and require inspection or replacement.
If the kettle leaks, it is essential to identify the source of the leak. Inspect the base, lid, and spout for cracks or damage. A leaking kettle often indicates a failure in the seal. If cracks are found, consider replacing the kettle or seeking professional repair if it is still under warranty.
Additionally, pay attention to unusual noises during operation. A loud popping or bubbling sound may suggest mineral deposits on the heating element. Regular cleaning can help mitigate this issue. If you hear rattling noises, components inside the kettle may be loose or damaged.
In cases where the kettle emits strange odors or smoke, immediately unplug the appliance and allow it to cool. This can indicate overheating or electrical issues. Do not attempt to use the kettle again until it has been thoroughly inspected and repaired.
For persistent issues that cannot be diagnosed through these steps, consult the manufacturer’s troubleshooting guide or contact a professional repair service. Regular maintenance and careful observation can prolong the life of your electric kettle and ensure safe operation.

Repair Guide for Handheld Vacuums
Handheld vacuums are convenient tools for quick clean-ups, but they can encounter various issues over time. This guide covers common problems and step-by-step instructions for DIY repairs.
Common Issues
- Lack of suction
- Battery not charging
- Brush roll not spinning
- Strange noises
Tools You’ll Need
- Screwdriver set (Phillips and flathead)
- Multimeter
- Replacement parts (filters, batteries, brushes)
- Cleaning cloth
Step-by-Step Repair Process
1. Lack of Suction
- Check the dust container: Empty it if full and clean any debris.
- Inspect the filters: Replace or clean them if clogged.
- Check for blockages: Look for any obstructions in the hose or nozzle.
2. Battery Not Charging
- Inspect the charging cable: Look for frays or damage.
- Test the wall outlet: Ensure it’s functioning properly.
- Use a multimeter: Check the voltage of the battery.
- Replace the battery if it fails the voltage test.
3. Brush Roll Not Spinning
- Check for hair or debris: Remove any tangles from the brush roll.
- Inspect the motor: Ensure it’s functioning by listening for sounds when powered on.
- Replace the motor if it’s damaged or does not operate.
4. Strange Noises
- Identify the source of the noise: Tip the vacuum to locate loose parts.
- Tighten screws and components: Ensure everything is secured properly.
- Replace worn bearings or motors if noise persists.
Tips for Maintenance
- Regularly clean the filters and dust container.
- Store the vacuum in a dry place to prevent moisture damage.
- Charge the battery fully before storage.
By following this guide, you can effectively troubleshoot and repair your handheld vacuum, ensuring its longevity and performance.
Replacing Components in Electric Hair Dryers
Repairing electric hair dryers can often save you the cost of replacement. Common components that may require replacement include the heating element, motor, switch, and power cord. Each part plays a crucial role in the functionality of the dryer.
Before starting any repairs, ensure the hair dryer is unplugged. Gather necessary tools such as screwdrivers, a multimeter, and a soldering iron if needed.
| Component | Symptoms of Failure | Replacement Steps |
|---|---|---|
| Heating Element | No heat, unusual noises | 1. Open the casing. 2. Disconnect wires from the element. 3. Remove and replace with a new heating element. 4. Reconnect wires and close the casing. |
| Motor | Weak airflow, motor not running | 1. Open the casing. 2. Disconnect the motor wires. 3. Remove the old motor. 4. Install the new motor and reconnect wires. 5. Close the casing. |
| Switch | Difficulties turning on/off | 1. Open the casing. 2. Take note of wiring connections. 3. Remove and replace the switch. 4. Reconnect the wiring and close the casing. |
| Power Cord | Frayed cord, no power | 1. Open the casing. 2. Disconnect the old cord from the terminals. 3. Attach the new power cord. 4. Close the casing securely. |
Testing the hair dryer after replacing components is essential. Plug it in and evaluate its performance. If it operates correctly, your repair was successful. Always consult the manufacturer’s guidelines for specific instructions and safety precautions while undertaking repairs.
When to Call a Professional for Appliance Repair
While many small appliance repairs can be successfully handled with DIY methods, there are specific situations where it is wise to contact a professional. Recognizing these instances can save you time, money, and potential further damage to your appliance.
1. Electrical Issues: If you encounter any problems related to wiring, short circuits, or appliance malfunction that causes sparks or unusual noises, it is essential to call a professional. Dealing with electrical components without adequate knowledge can lead to serious safety hazards.
2. Warranty Considerations: Check if your appliance is still under warranty. Attempting self-repair could void the warranty agreement. In this case, seeking professional help ensures that you do not lose your right to warranty service.
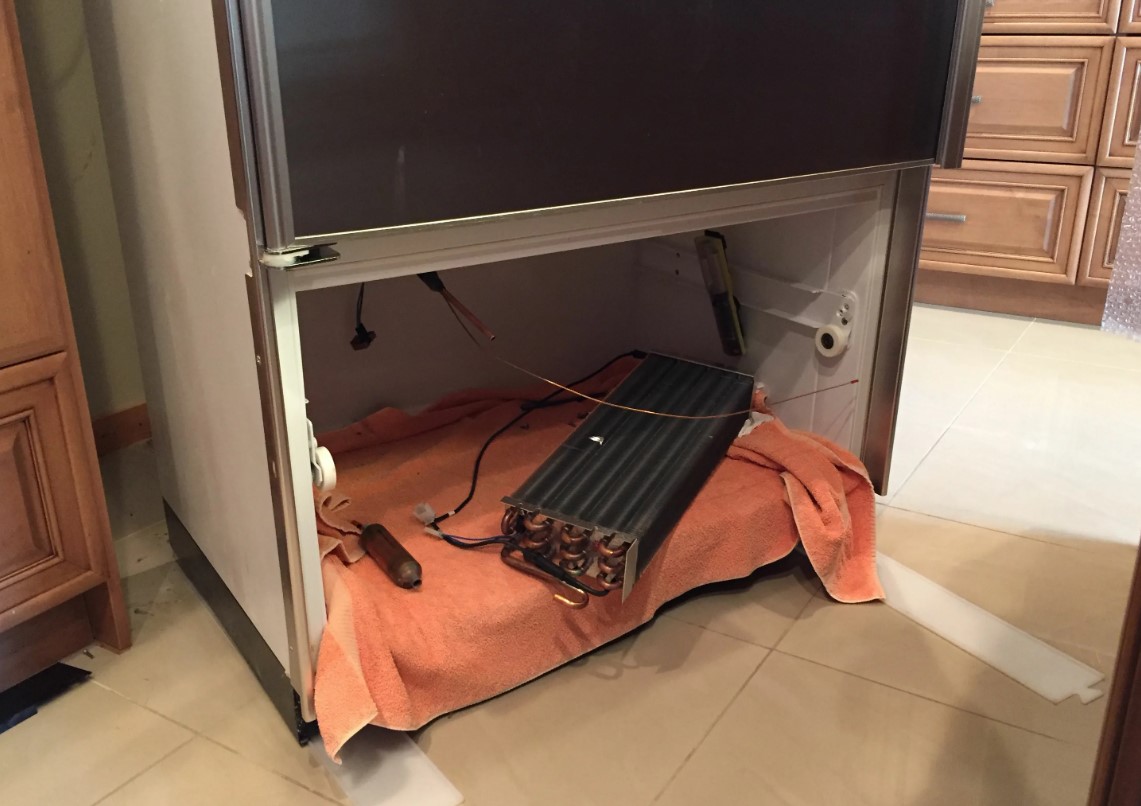
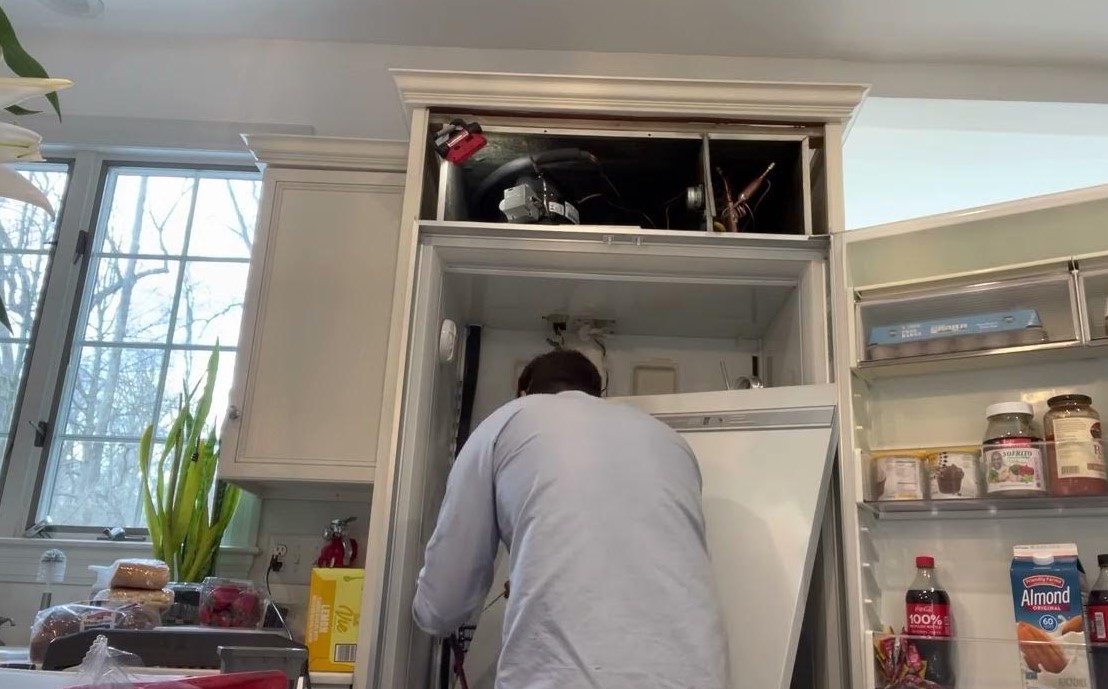
3. Complex Repairs: Certain repairs, such as replacing a compressor in a refrigerator or addressing issues with a motor in a washing machine, often require specialized tools and expertise. If the repair appears to be too complicated, hiring a professional can provide a more effective and durable solution.
4. Lack of Spare Parts: If you find that replacement parts are hard to come by or if you are unsure of the specific parts needed, it may be wise to consult a professional. They have access to resources and can source the correct components quickly.
5. Persistent Issues: If your appliance frequently breaks down or shows recurring problems, it may indicate a more significant underlying issue. A professional can conduct a thorough diagnosis, potentially saving you from ongoing repair costs and frustrations.
6. Time Constraints: If you have a busy schedule and cannot afford the time to troubleshoot or repair the appliance, calling in an expert can often be the most practical solution. This allows you to focus on your other responsibilities while ensuring the repair is handled efficiently.
In summary, while many small appliance repairs can be managed on your own, recognizing when to seek professional assistance is crucial. Assessing the risks, complexities, and the state of your appliance can guide your decision and ultimately lead to better outcomes.
Q&A — Small appliance repair:
What are some common small appliances that can be repaired at home?
Many small appliances can be repaired easily at home, including toasters, blenders, coffee makers, electric kettles, and microwaves. Before trying to fix any appliance, it’s important to identify the issue, as some problems may be more complex than others. Basic repairs often include replacing fuses, cleaning components, or fixing cords. For specific problems, consulting a user manual or online resources may provide helpful guidance.
How can I troubleshoot my broken blender before attempting a repair?
To troubleshoot a broken blender, first check that it is properly plugged in and the electrical outlet is functional. If it won’t turn on, inspect the power cord for any damage. If it runs but doesn’t blend, see if there’s food stuck in the blades or if the container is properly secured. Cleaning the blades and ensuring all parts fit correctly can often resolve common issues. If problems persist, further investigation may be needed based on symptoms.
What tools do I need for small appliance repairs?
For most small appliance repairs, you will need a basic toolkit. This typically includes a set of screwdrivers (both flathead and Phillips), pliers, wire cutters, a multimeter for electrical testing, and possibly a soldering iron for wire repairs. Having a flashlight can also help you see inside darker areas of appliances. It’s advisable to research the specific appliance for any unique tools that may be required.
Are there any safety precautions I should take while repairing small appliances?
Yes, safety is paramount when repairing small appliances. Always unplug the device before attempting any repair to avoid electrical shocks. Wear safety goggles to protect your eyes from any flying debris, especially when working with blenders or food processors. If you’re dealing with electrical components, ensure that your workspace is dry and that you are not working with any wet hands or surfaces. If you feel uncertain about a repair, do not hesitate to consult a professional.
What are some tips for successfully fixing a coffee maker?
To fix a coffee maker, start by descaling it if you notice slow brewing or buildup. Use equal parts of vinegar and water to clean the internal parts. Ensure that all components, such as the filter and carafe, are in place and clean. If the machine does not heat, check the power cord and plug for any damage. If it still does not function after troubleshooting, you may need to replace the heating element or refer to the manufacturer for assistance.
APPLIANCE REPAIR in California — fast, reliable, and affordable service that brings your home appliances back to life. Get expert help today and enjoy worry-free comfort!