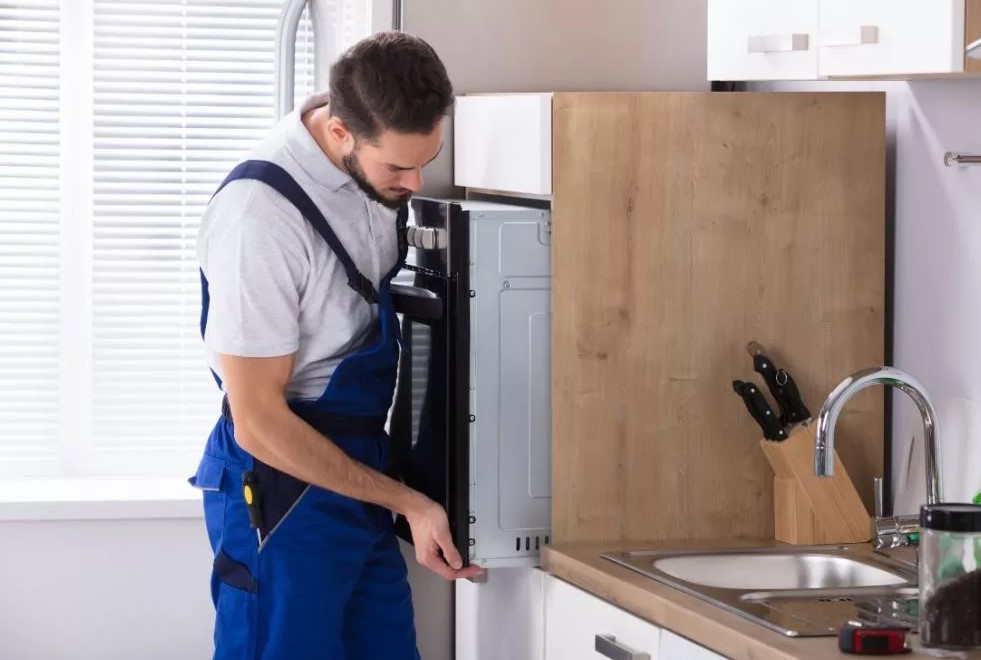
Samsung dishwasher repair is often a task homeowners can handle themselves, even though these appliances are known for their reliability and advanced features. Maintaining a functional dishwasher is essential for a smooth-running kitchen. Like any appliance, however, Samsung dishwashers can encounter issues over time. This troubleshooting guide aims to equip you with the necessary knowledge to identify and resolve common problems. By following our step-by-step approach, you can save time and money on repairs while gaining a better understanding of your appliance.
Before diving into the repairs, it’s crucial to recognize that some issues may be simple fixes, while others may require professional attention. This guide will cover a variety of common complaints, including insufficient cleaning, unusual noises, and error codes. Armed with the right tools and a bit of patience, you can tackle these problems with confidence.
In this comprehensive guide, we will walk you through the troubleshooting process, ensuring you have a clear understanding of each step. From checking the water supply to inspecting the spray arms and filters, we will highlight what to look for and explain how to resolve each problem effectively. Whether you’re a seasoned DIYer or attempting repairs for the first time, you’ll find the information here helpful and straightforward.

Samsung Dishwasher Repair: Step-by-Step Troubleshooting Guide
If your Samsung dishwasher is not functioning properly, follow this troubleshooting guide to identify and resolve common issues. Begin by checking the power supply.
Step 1: Check Power Supply
Ensure the dishwasher is plugged in and the outlet is functioning. Test the outlet using another appliance. If there is no power, check the circuit breaker or replace a blown fuse.
Step 2: Inspect Door Latch
The dishwasher will not operate if the door is not securely latched. Examine the latch for any signs of damage or obstruction. If the latch is broken, replace it to restore functionality.
Step 3: Examine Water Supply
Verify that the water supply is turned on. Inspect the water inlet valve for clogs or damage. Clean or replace the valve if necessary to ensure proper water flow.
Step 4: Check for Blockages
Remove the drain filter and inspect it for food debris or blockages. Clean the filter thoroughly and check the drainage hose for kinks or obstructions. A clear drain is essential for proper operation.
Step 5: Assess Spray Arms
Remove the spray arms and clean them to eliminate any food particles or mineral buildup. Ensure they are rotating freely when reinstalled. Blocked spray arms can lead to inadequate cleaning performance.
Step 6: Run a Diagnostic Test
Consult your user manual for instructions on how to run a diagnostic test on your Samsung dishwasher. This test can help identify error codes or malfunctioning components.
Step 7: Address Error Codes
If your dishwasher displays an error code, refer to the manual for specific troubleshooting steps for that code. Resolving these errors can often restore normal operation.
Step 8: Seek Professional Help
If the previous steps do not resolve the issue, consider contacting a qualified technician. Some repairs may require professional expertise, especially if electronic components are involved.

Identifying Common Samsung Dishwasher Problems
Identifying issues with your Samsung dishwasher is the first step toward effective troubleshooting. Here are some common problems you might encounter:
- Dishwasher Won’t Start:If your dishwasher doesn’t respond, check the power supply, door latch, and control panel settings.
- Water Not Draining:Water pooling at the bottom can be caused by a clogged drain filter, garbage disposal connection, or kinked drain hose.
- Dishes Not Clean:Poor cleaning might be due to overloaded racks, blocked spray arms, or using an incorrect detergent type.
- Strange Noises:Unusual sounds could indicate loose parts, foreign objects in the pump, or malfunctioning motor components.
- Leakage:Inspect door seals, inlet hoses, and drain connections for any signs of leaks or damage.
- Rust or Corrosion:Look for rust on metal components or interiors, which usually suggests moisture retention or scratch damage.
- Display Error Codes:Error codes can help pinpoint specific malfunctions. Refer to your user manual for details on what each code means.
- Unpleasant Odors:Bad smells may result from food debris in the filter or interior, requiring a thorough cleaning.
By recognizing these common problems, you will be better equipped to diagnose and address issues with your Samsung dishwasher effectively.
Checking Power Supply Issues
When addressing issues with your Samsung dishwasher, the first step is to ensure that it is receiving adequate power. Power supply problems can lead to malfunctioning features or complete inoperability of the appliance.
Verify the Power Source
Begin by checking the outlet where the dishwasher is plugged in. Use a multimeter to measure the voltage to ensure it matches the required specifications (typically around 120 volts in North America). If the outlet is not providing power, try plugging in another device to see if it works. If it does not, the issue may be with the electrical outlet itself.
Inspect the Power Cord and Connections
Next, examine the dishwasher’s power cord for any signs of damage, such as fraying or cuts. If you find any defects, the cord may need to be replaced. Additionally, ensure that the power cord is securely connected to the dishwasher. A loose connection can cause intermittent power issues. If these connections appear solid, check the circuit breaker to ensure it has not tripped, as this could interrupt power to the appliance.
Assessing Water Supply and Drainage Problems
When encountering issues with your Samsung dishwasher, the first step is to evaluate the water supply and drainage systems. These are critical components that directly affect the functionality of the appliance. Proper water supply and efficient drainage are vital for optimal performance and cleaning results.
Checking Water Supply
Start by ensuring that the dishwasher is receiving adequate water supply. Inspect the water inlet valve, usually located at the back of the dishwasher. Ensure that the valve is fully open, allowing water to flow into the machine. Next, examine the water supply line for any kinks, clogs, or leaks that might impede water flow. If the line appears damaged, consider replacing it. Additionally, verify that your household’s water supply is functioning properly by checking other faucets to confirm water pressure is adequate.
Inspecting Drainage System
After ensuring water supply, focus on the drainage system. A common issue in dishwashers is clogged drains, which can lead to standing water inside the appliance. Inspect the drain hose for any blockages or kinks that could restrict water flow. Remove any debris found in the hose or the air gap, if present. Furthermore, check the dishwasher’s filter for clogs, as a clean filter promotes better drainage. If these components are clear and the problem persists, the issue may be with your home’s plumbing, which may require professional assistance.

Inspecting Door Latch and Switch Malfunctions
The door latch and switch are crucial components of your Samsung dishwasher, ensuring that the door is securely closed during operation. If the dishwasher fails to start or shows an error code, it is essential to inspect these parts first.
First, examine the door latch for any signs of damage or wear. A defective latch may not engage properly, preventing the door from closing securely. Look for broken plastic pieces or misalignment that could affect its operation. If you notice any issues, the latch should be replaced.
Next, check the door switch. This component detects whether the door is closed. Use a multimeter to test the switch for continuity. Disconnect the door switch from the wiring harness, then set your multimeter to the resistance settings. Press the switch; if it does not show continuity when closed, it may be faulty and require replacement.
Additionally, inspect the alignment of the door itself. Sometimes, the door can become misaligned, leading to improper closure or latch engagement. Ensure the door is level and that the hinges are not bent or damaged.
If the latch and switch appear functional, inspect the wiring connecting them to the control board. Look for signs of fraying, corrosion, or loose connections. Damaged wires can cause intermittent operation or complete failure of the dishwasher to start.
Once troubleshooting is complete, reassemble any components and test the dishwasher to ensure that it operates correctly. Paying close attention to the door latch and switch can often resolve common operational issues.
Cleaning and Maintaining Spray Arms
The spray arms in your Samsung dishwasher play a crucial role in ensuring that dishes are cleaned effectively. Over time, debris and mineral deposits can accumulate in these components, leading to poor cleaning performance. Regular maintenance of the spray arms will enhance the efficiency of the dishwasher and prolong its lifespan.
Why Cleaning is Important
- Prevents blockage and ensures proper water flow.
- Improves cleaning performance, leading to spotless dishes.
- Extends the life of the spray arms and the dishwasher.
Step-by-Step Cleaning Process
- Remove the Spray Arms:Begin by turning off the dishwasher and disconnecting it from the power supply. Carefully remove the lower spray arm by turning it counterclockwise. If your model has an upper spray arm, you may need to unscrew it as well.
- Inspect for Damage:Check for any cracks or damages in the spray arms. If they are damaged, consider replacing them to ensure optimal performance.
- Rinse Under Water:Hold the spray arms under warm running water to remove loose debris. Make sure to spin the arms to dislodge any particles stuck inside.
- Clear Blockages:Use a toothpick or a small brush to clear any blocked spray holes. Ensure that all openings are unobstructed for proper water flow.
- Soak in Vinegar:If mineral deposits are visible, soak the spray arms in a mixture of equal parts vinegar and water for about 30 minutes to dissolve the buildup.
- Final Rinse and Reinstall:Rinse the spray arms thoroughly to remove any remaining vinegar. Reinstall the spray arms by aligning them with their mounting points and twisting them securely.
By maintaining the spray arms regularly, you can ensure that your Samsung dishwasher operates at its best, preventing performance issues and enhancing cleaning efficiency.
Troubleshooting Filtering System Clogs
The filtering system in your Samsung dishwasher plays a critical role in maintaining clean dishware by preventing food particles and debris from recirculating during the wash cycle. If your dishwasher isn’t cleaning effectively, the filtering system may be clogged. Here’s a step-by-step guide to troubleshoot and resolve filtering system clogs.
Step 1: Turn Off the Dishwasher
Before starting any maintenance or inspection, ensure the dishwasher is completely turned off and unplugged from the power source to avoid electrical hazards.
Step 2: Access the Filter
Open the dishwasher door and remove the bottom dish rack to gain access to the filter. The filter is typically located at the bottom of the tub. In many models, it can be pulled straight out or may require a twist to release it from its housing.
Step 3: Inspect the Filter
Carefully examine the filter for any visible clogs or buildup. Food particles, grease, and minerals can accumulate over time, hindering the filter’s ability to function properly. If you notice any blockage, proceed to clean it thoroughly.
Step 4: Clean the Filter
Rinse the filter under warm running water to remove any loose debris. For stubborn residues, use a soft brush or sponge with mild detergent. Make sure to clean all areas of the filter, including the mesh screen and any corners where dirt may collect. Rinse well to ensure no soap remains.
Step 5: Check the Filter Housing
After cleaning the filter, inspect the filter housing for any debris that might obstruct the filter’s reinstallation. Use a damp cloth to wipe any residue or buildup inside the housing to ensure a proper fit for the filter.
Step 6: Reinstall the Filter
Once the filter is clean and the housing is free of debris, carefully reinstall the filter by either twisting it back into place or pushing it down until it clicks securely. Ensure that it is properly secured to avoid leaks during operation.
Step 7: Run a Test Cycle
Plug the dishwasher back in and run a short cycle without any dishes to check if the clog has been resolved. Observe whether water drains properly and if there are any unusual sounds or leaks.
Step 8: Repeat if Necessary
If the issue persists, you may need to inspect additional components of the filtering system, such as the sump area and drain hose, for further blockages or damage. Consult your user manual for specific guidance related to your model.
Regular maintenance of the filtering system is crucial for optimal dishwasher performance. Clean the filter weekly or monthly, depending on usage, to prevent future clogs and maintain the efficiency of your Samsung dishwasher.

Examining Control Panel and Settings for Errors
When troubleshooting a Samsung dishwasher, complications often originate from the control panel or settings. Proper examination can swiftly identify any malfunctions that may hinder performance. Start by inspecting the control panel for any visible damage or wear, ensuring all buttons and displays function correctly.
Common Control Panel Issues
Several problems can stem from the control panel, including unresponsive buttons, incorrect cycle selections, or error codes displayed on the screen. It’s essential to manage these issues systematically:
| Issue | Possible Causes | Solutions |
|---|---|---|
| Unresponsive Buttons | Moisture buildup, dirt, or faulty touchpad | Dry the panel with a clean cloth, clean buttons gently, or replace the touchpad if necessary |
| Incorrect Cycle Selections | Settings misconfiguration or stuck buttons | Reset the dishwasher and re-select the desired cycle; check if buttons are stuck |
| Displayed Error Codes | Internal components malfunctioning or communication errors | Refer to the user manual for specific error codes and suggested fixes; reset the dishwasher power |
Resetting the Control Panel
If you encounter persisting issues, performing a hard reset can often resolve many minor problems. To reset the control panel:
- Turn off the dishwasher and unplug it from the power source.
- Wait for at least 5 minutes to ensure complete disconnection.
- Plug the appliance back in and turn it on.
- Re-check the control panel for any changes or improvements.
This simple reset can help restore normal functionality and eliminate minor glitches in the control system.
Addressing Drain Pump and Motor Failures
The drain pump and motor play a crucial role in the effective operation of your Samsung dishwasher, ensuring that water is properly removed after each wash cycle. If you’re experiencing issues such as standing water in the bottom of the dishwasher or prolonged washing cycles, it may indicate a failure in these components. Below is a step-by-step guide to diagnose and resolve issues related to the drain pump and motor.
Step 1: Evaluate the Symptoms
Begin by observing the dishwasher’s behavior. Check for any unusual noises, slow draining, or error codes displayed on the control panel. Common error codes related to drainage may include «LE,» «9E,» or similar messages. Take note of these indicators to assist with further troubleshooting.
Step 2: Inspect the Drain Pump and Motor
To access the drain pump, turn off the power to the dishwasher and remove the lower spray arm and the filter assembly. Look for any debris, food particles, or blockages around the pump inlet that could hinder operation. Clean any obstructions thoroughly. Next, check the motor for continuity using a multimeter. If the motor shows an open or short circuit, it may need to be replaced.
Additionally, listen for weird sounds when the pump is operational. Grinding or buzzing noises can indicate a malfunction. If the pump doesn’t activate at all, check the wiring connections and ensure they are secure and free of corrosion.
By following these steps, you can effectively address issues with the drain pump and motor in your Samsung dishwasher, ensuring optimal performance and longevity.
Fixing Leaks and Water Ingress Issues
Leaks and water ingress issues in Samsung dishwashers can lead to significant damage if not addressed promptly. Identifying the source of the leak is critical for an effective repair. Start by examining the door seal and gasket, as these areas are common points of failure. Check for any visible signs of wear, cracks, or debris accumulation that could prevent a proper seal.
Inspecting the Door Seal
To inspect the door seal, thoroughly clean the rubber gasket around the door frame. Use a soft cloth and mild detergent to remove any residue or food particles. Once cleaned, run your fingers along the seal to detect any tears or deformities. If any damages are identified, it may be necessary to replace the door gasket to ensure a tight seal during operation.
Checking the Hoses and Connections
Another common cause of leaks is faulty hoses. Start by examining the water inlet hose, drain hose, and any connection points for signs of wear or loose fittings. Ensure that the connections are tight and secure. Look for any kinks or blockages in the hoses that could impede water flow. If any hoses are cracked or damaged, replacement will be essential to stop leaks and restore proper function.
Resetting Your Samsung Dishwasher
Resetting your Samsung dishwasher can resolve various issues such as unresponsive controls, error codes, and malfunctioning cycles. Follow these steps to reset your appliance effectively.
Step-by-Step Reset Process
- Ensure the dishwasher is turned on. If it is not, press the «Power» button.
- Open the door of the dishwasher to interrupt any running cycles.
- Press and hold the «Start/Reset» button for about 3 seconds. This action should reset the current cycle.
- Close the door securely to allow the reset to take effect.
- Wait for about 15 seconds, then check if the display resets to the default setting.
Alternative Reset Method
If the above steps do not work, you may need to perform a hard reset:
- Disconnect the dishwasher from the power source by unplugging it or turning off the circuit breaker.
- Wait for at least 5 minutes to ensure all residual power is drained.
- Reconnect the dishwasher to the power source.
- Turn on the dishwasher and check if the error code persists or if operations are normal.
These resetting methods typically solve minor technical problems. If issues continue, consider consulting the user manual or seeking professional assistance.
When to Seek Professional Repair Services
While many minor issues with Samsung dishwashers can be resolved through basic troubleshooting, there are specific situations where seeking professional repair services is the best course of action. Understanding these circumstances can save you time and prevent further damage to your appliance.
Persistent or Severe Problems
If you encounter issues such as persistent error codes, continuous drainage problems, or a malfunctioning door latch that troubleshooting steps fail to resolve, it is advisable to consult a professional. These indications often suggest underlying mechanical or electrical failures that require specialized knowledge and tools for accurate diagnosis and repair.
Safety Concerns
In scenarios where there are safety risks, such as unusual smells, leaking water, or electrical issues, immediate professional assistance is essential. Attempting to repair these problems on your own could lead to hazardous situations, including electrical shocks or water damage. Professionals are trained to handle such risks safely and effectively.
Q&A — Samsung dishwasher repair:
What are the common signs that my Samsung dishwasher needs repair?
There are several indications that may suggest your Samsung dishwasher requires repair. Common signs include unusual noises during operation, water not draining properly, error codes displayed on the control panel, leaks underneath the unit, and dishes coming out dirty or not adequately cleaned. If you notice any of these issues, it’s advisable to troubleshoot the problem or contact a professional for further assistance.
How can I troubleshoot my Samsung dishwasher that isn’t cleaning dishes effectively?
If your Samsung dishwasher isn’t cleaning dishes effectively, first check the spray arms. Ensure they are not clogged with food particles and can rotate freely. Next, verify that the dishwasher is loading correctly; avoid overloading it and ensure items are placed properly to allow water flow. Additionally, check the detergent used; it should be fresh and appropriate for your model. Running a cleaning cycle with dishwasher cleaner can also help remove any buildup that might affect performance.
What should I do if my Samsung dishwasher is displaying an error code?
Error codes on Samsung dishwashers can indicate a variety of issues. First, refer to the user manual or manufacturer’s website to identify what the specific code means. Common codes might relate to problems with water supply, drainage, or electrical components. After identifying the issue, try resetting the dishwasher by turning it off and unplugging it for a few minutes. If the code persists after the reset, further investigation or professional repair may be needed.
Can I fix a leaking Samsung dishwasher on my own?
Yes, you can attempt to fix a leaking Samsung dishwasher yourself, depending on the source of the leak. Start by checking the door seals for cracks or debris that could prevent a proper seal. Inspect hose connections for any leaks and tighten them if necessary. Additionally, check the drain pump for clogs and ensure the dishwasher is level. If the leak continues after these checks, it may require a more in-depth diagnosis, which might be best left to professionals.
How often should I perform maintenance on my Samsung dishwasher?
Regular maintenance can help keep your Samsung dishwasher running efficiently. It’s recommended to clean the filter monthly, check the spray arms for clogs, and wipe down the door and seals to prevent buildup. Additionally, running a cleaning cycle every few months can help maintain overall performance. If you notice any unusual sounds or issues during these maintenance checks, it may be time to troubleshoot further or seek repairs.
APPLIANCE REPAIR in California — fast, reliable, and affordable service that brings your home appliances back to life. Get expert help today and enjoy worry-free comfort!