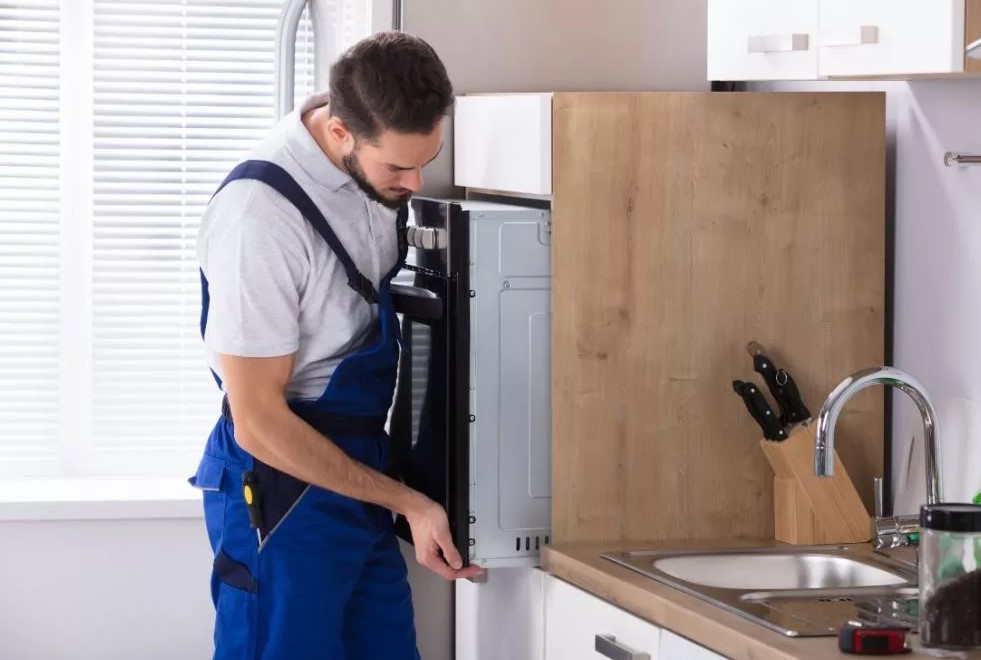
Maytag repair is a necessary service even for the most durable home appliances. When it comes to home appliances, Maytag stands out for its durability and reliability. However, even the best machines can encounter issues over time. This comprehensive guide aims to equip homeowners with the knowledge and skills necessary to troubleshoot and handle various Maytag appliances, ensuring they continue to serve efficiently.
Understanding the common problems associated with Maytag appliances is the first step in successful repair. From washing machines that won’t spin to refrigerators that stop cooling, knowing what to look for can save both time and money. This guide delves into the most frequent issues, ranging from minor glitches to major malfunctions, along with detailed instructions on how to address them.
Additionally, this guide provides essential tips and tricks to facilitate the repair process. Whether you are a seasoned DIY enthusiast or a novice homeowner, having the right information at your fingertips is invaluable. With step-by-step instructions, diagrams, and troubleshooting techniques, fixing your Maytag appliances can become a straightforward task.

Troubleshooting Common Maytag Washer Issues
When your Maytag washer isn’t functioning as expected, it’s important to identify the problem quickly. Below are some common issues and their troubleshooting steps:
- Washer Won’t Start:If your washer fails to start, check the following:
- Ensure the power cord is securely plugged into the outlet.
- Check the circuit breaker for tripped fuses.
- Verify that the door is fully closed; many models have a door lock that prevents starting.
- No Water in the Washer:If your washer is not filling with water:
- Inspect the water supply hoses for kinks or blockages.
- Ensure the water valves are fully opened.
- Check the inlet screens for dirt and debris; clean them if necessary.
- Washer Not Draining:For washers that won’t drain:
- Examine the drain hose for clogs or bends.
- Check the pump filter for obstructions and clean as needed.
- Run a spin cycle to see if the issue resolves itself.
- Unusual Noises During Operation:If your washer makes strange sounds:
- Confirm that the washer is level; uneven placement can cause vibrations.
- Inspect the drum for foreign objects, such as coins or small items.
- Listen for unusual sounds from the motor or belt, which may indicate wear.
- Clothes Still Wet After Spin Cycle:If your clothes are not fully dry:
- Check if the load is too large; overloading can prevent proper spinning.
- Test the spin cycle settings; ensure they are set correctly.
- Inspect the drain system for clogs that could be affecting performance.
If these troubleshooting tips do not resolve the issues, it may be necessary to consult the user manual or contact a professional for further assistance.
Steps to Repair a Maytag Dryer Not Heating
If your Maytag dryer is not heating, it can be frustrating. Follow these steps to troubleshoot and repair the issue:
| Step | Action | Description |
|---|---|---|
| 1 | Check the Power Supply | Ensure the dryer is plugged in and the circuit breaker is not tripped. A loss of power can prevent heating. |
| 2 | Inspect the Thermal Fuse | Locate the thermal fuse in the dryer. Use a multimeter to test for continuity. Replace if blown. |
| 3 | Examine the Heating Element | Remove the back panel to access the heating element. Check for any visible damage or breaks and test for continuity. |
| 4 | Check the Igniter (Gas Models) | For gas dryers, examine the igniter for damage. A faulty igniter will prevent the dryer from heating. |
| 5 | Inspect the Gas Valve (Gas Models) | Check the gas valve solenoids. Replace if they are not allowing gas to flow to the burner. |
| 6 | Examine the Timer | Test the timer for proper function. A malfunctioning timer may disrupt the heating cycle. |
| 7 | Check the Main Control Board | Inspect the control board for any burn marks or damage. Replace if necessary. |
| 8 | Reconnect Power | Once all checks and repairs are complete, plug the dryer back in and run a test cycle to ensure heating. |
By following these steps, you should be able to diagnose and fix the heating issue with your Maytag dryer. If problems persist, consider contacting a professional technician for assistance.
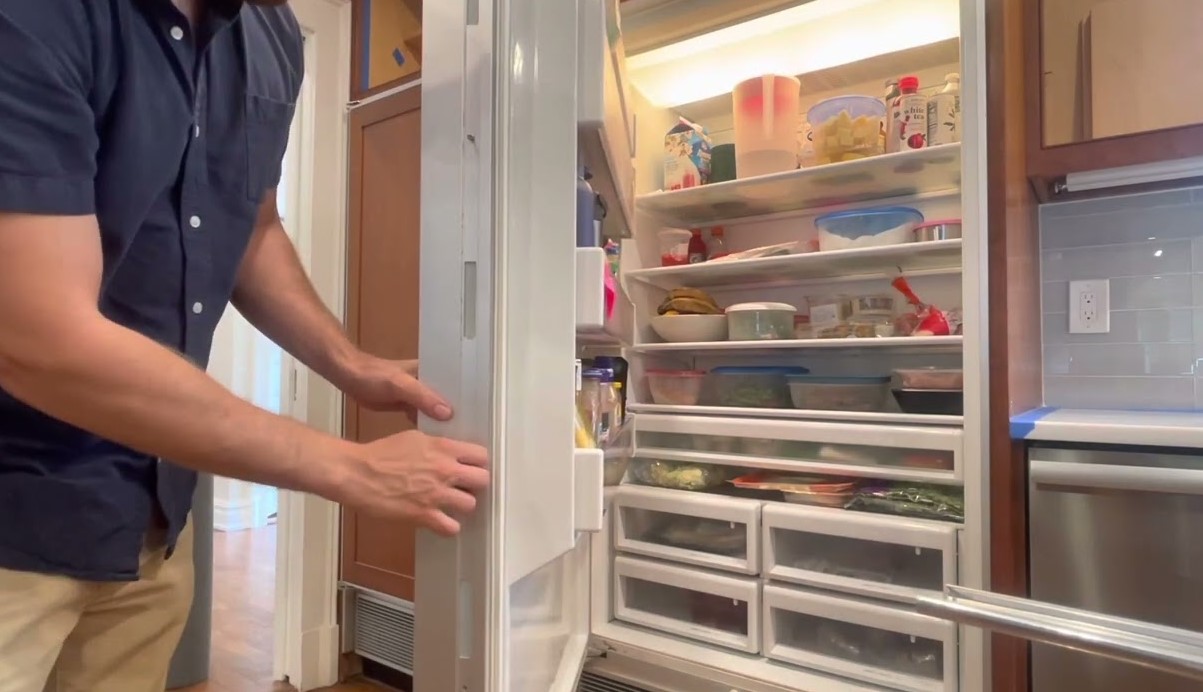
How to Fix Maytag Refrigerator Cooling Problems
If your Maytag refrigerator is not cooling properly, you can troubleshoot common issues and apply necessary fixes to restore its functionality. Start by assessing the situation systematically.
Check the Temperature Settings
Ensure that the temperature settings are set to the appropriate levels. The ideal temperature for the refrigerator is between 35°F and 38°F (1.7°C to 3.3°C). If the temperature is set too high, it may not cool effectively. Adjust the settings using the control panel and wait a few hours to see if the temperature stabilizes.
Inspect the Door Seals
Damaged or dirty door seals can cause cold air to escape, leading to cooling problems. Check the seals for any signs of wear, cracks, or dirt. Clean the seals with warm, soapy water to remove any debris. If the seals are damaged, they need to be replaced to ensure a proper seal when the doors are closed.
Also, test the door closure by closing the door slowly–if it doesn’t fit snugly or can be easily pulled open, it may indicate a problem with the seals. Rectifying this issue can help maintain the internal temperature effectively.
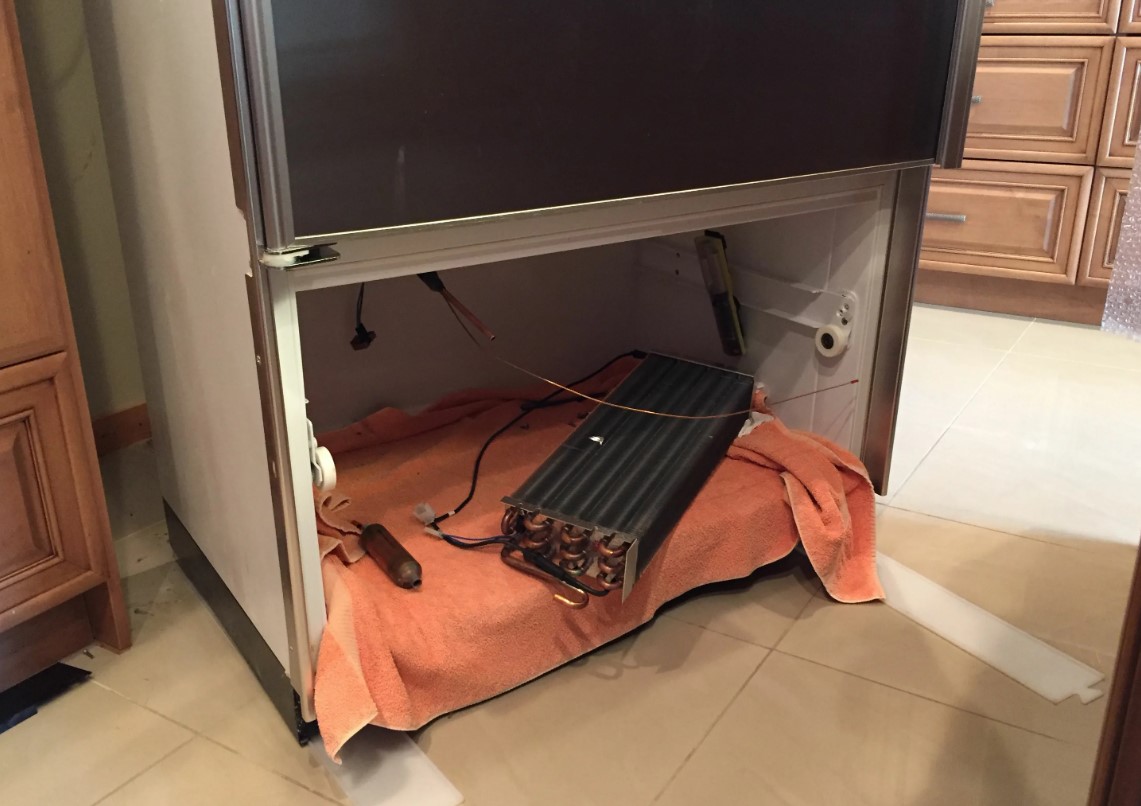
Examine the Condenser Coils
Dirty condenser coils can significantly affect the refrigerator’s cooling efficiency. Locate the coils, typically found at the back or beneath the appliance, and inspect them for dust and debris buildup. Turn off the refrigerator before cleaning the coils with a soft brush or vacuum to ensure they are free from obstructions, promoting better airflow and cooling capability.
Test the Fan and Compressor
The evaporator fan and condenser fan play crucial roles in cooling. Check if the fans are running when the compressor is operating; if not, you may need to replace the faulty fans. Additionally, listen for unusual noises from the compressor. If the compressor is not functioning properly, it may require professional assistance to diagnose and repair.
After performing these checks, give your refrigerator time to adjust. If cooling issues persist, consult the user manual for your specific model or contact a qualified technician for further diagnosis and repair options.

Addressing Maytag Dishwasher Drainage Failures
When a Maytag dishwasher fails to drain properly, it can lead to water pooling at the bottom and cause numerous operational issues. Understanding the common causes and their solutions is crucial for effective repairs.
Common Causes of Drainage Failures
- Clogged Drain Filter: Food particles and debris can accumulate and block the drain filter, preventing water from draining.
- Kinked Drain Hose: A bent or kinked drain hose can restrict water flow and result in drainage problems.
- Faulty Drain Pump: If the drain pump is malfunctioning, it can fail to remove water effectively from the dishwasher.
- Blocked Air Gap: If your dishwasher has an air gap, it may become clogged and lead to drainage issues.
Steps to Troubleshoot and Fix the Issue
- Check the Drain Filter:
- Open the dishwasher and locate the drain filter at the bottom.
- Remove and clean it thoroughly under running water.
- Reinstall the filter and test the dishwasher.
- Inspect the Drain Hose:
- Locate the drain hose connected to the sink or garbage disposal.
- Ensure it is not kinked or crushed; if necessary, adjust the positioning.
- Check for blockages and clean if needed.
- Examine the Drain Pump:
- Access the drain pump by removing the lower spray arm and cover.
- Look for debris and clear any obstructions.
- Test the pump by running a cycle and observing its operation.
- Clean the Air Gap:
- If your model has an air gap, remove the cover and clean any debris.
- Ensure that the air gap is correctly installed and not blocked.
If these troubleshooting steps do not resolve the issue, consider contacting a professional technician for further analysis. Regular maintenance and timely checks can help prevent drainage failures and extend the lifespan of your Maytag dishwasher.
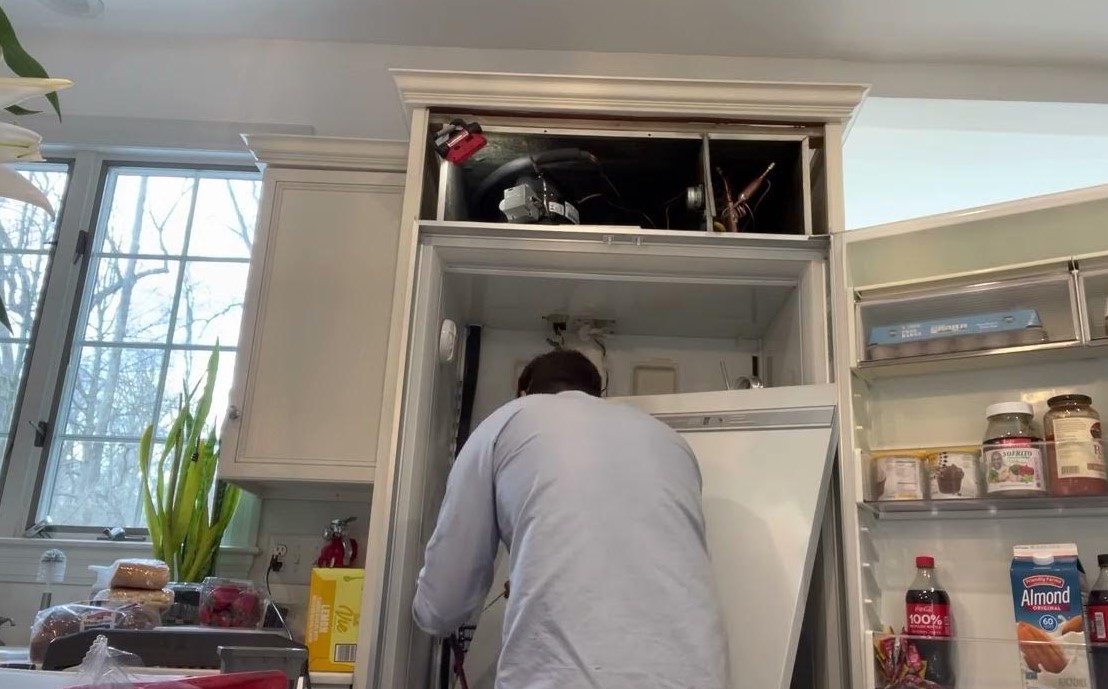
Replacing Maytag Appliance Water Filters
Replacing the water filter in your Maytag appliances is essential for maintaining clean and safe drinking water. Whether you own a refrigerator with a built-in water dispenser or an ice maker, regular filter changes will ensure optimal performance and quality. Follow these guidelines for a successful replacement process.
Identifying the Right Water Filter
Before purchasing a new water filter, identify the specific model that is compatible with your Maytag appliance. Check the owner’s manual for recommended filters or look for the model number on the existing filter. Common filter types include the Maytag UKF8001 and the Whirlpool EDR4RXD1. Ensure the replacement filter meets the same specifications to guarantee proper fit and function.
Steps to Replace the Water Filter
1. Locate the Water Filter: For most Maytag refrigerators, the water filter compartment is located either in the upper right corner, inside the refrigerator, or at the base of the appliance. Some models may have an access panel on the front.
2. Remove the Old Filter: Turn the filter counterclockwise or pull it out, depending on the model. Be prepared for some water to leak; have a towel handy to catch any spills.
3. Install the New Filter: Take the new filter out of its packaging and remove any protective covers. Align the new filter with the compartment and push or turn it into place until it clicks securely.
4. Reset the Filter Indicator: If your Maytag appliance has a filter status indicator, reset it according to the manufacturer’s instructions. Typically, this involves pressing and holding the reset button for a few seconds.
5. Flush the System: Allow the water to run for a few minutes to clear any carbon dust from the new filter. This step is crucial for ensuring clean water free of any contaminants.
Regular replacement of your Maytag appliance water filter is recommended every six months or as indicated by the filter status indicator. Consistent maintenance will ensure the longevity of your appliance and the quality of your water supply.
Guidelines for Repairing a Noisy Maytag Washing Machine
If your Maytag washing machine is making unusual noises, it can be both frustrating and concerning. Here are steps to diagnose and resolve these issues effectively.
First, identify the type of noise your washing machine is making. Common sounds include banging, thumping, squeaking, and grinding. Each type of noise can indicate different problems.
For banging or thumping noises, check the drum for foreign objects. Small items like coins or screws can get trapped and cause loud sounds during the spin cycle. Ensure that the load is balanced. Overloading or underloading the machine can lead to an uneven drum, creating excessive noise.
If you hear a squeaking noise, inspect the drive belt. A worn or damaged belt can slip off the pulleys and create friction sounds. Replace the belt if it appears frayed or damaged. Additionally, examine the pulleys and drum bearings for wear, as these components can also produce noise when faulty.
Grinding noises may indicate issues with the motor coupling or transmission. Inspect the motor coupling for any signs of damage or wear. If it’s broken, it will need replacement. Listen closely to determine if the motor is functioning properly; a failing motor can create grinding sounds.
For rattling noises, check for loose screws or fittings around the machine. Tightening these can often resolve the issue. Also, ensure the machine is level, as an uneven surface can cause rattling during operation.
Finally, ensure that your washing machine is placed on a sturdy, flat surface. Vibration can amplify noise, so make sure that it is properly leveled using adjustable feet. If the noise persists after following these steps, it may be advisable to consult a professional technician for further diagnosis and repair.
DIY Solutions for Maytag Oven Temperature Inaccuracy
Experiencing temperature inaccuracies in your Maytag oven can be frustrating, as it can affect the quality of your baked dishes. Fortunately, several DIY solutions can help you diagnose and potentially fix the issue without the need for a technician. Below are some practical steps and adjustments you can make to ensure your oven operates at the correct temperature.
1. Calibrate Your Oven
Ovens can often drift from their original settings over time. To check the oven’s accuracy, use an oven thermometer placed in the center of the oven. Preheat the oven to a specific temperature (e.g., 350°F) and monitor the actual temperature displayed on the thermometer. If there’s a significant difference, you can recalibrate your oven. Refer to your Maytag oven’s user manual for specific calibration instructions, often found in the settings menu. Adjust the temperature accordingly to align with the actual reading.
2. Inspect the Oven Door Seal
A faulty door seal can lead to heat escaping from the oven, causing temperature inaccuracies. Inspect the door gasket for any cracks, tears, or signs of wear. Close the oven door and check for any light leakage. If you notice any issues, replace the door seal with a new one. You can usually order a replacement from the Maytag parts website or your local appliance store. Ensuring a tight seal will help maintain the internal temperature effectively.
By following these DIY solutions, you can address temperature inaccuracies in your Maytag oven and enhance your cooking experience. Regular maintenance and checks can prevent future issues and keep your oven functioning efficiently.
Identifying and Fixing Maytag Microwave Electrical Issues
When dealing with electrical issues in your Maytag microwave, proper identification of the problem is essential before attempting any repairs. Common symptoms include the microwave not turning on, inconsistent heating, or unexpected shutdowns. Understanding the potential causes can help you effectively troubleshoot and resolve these issues.
Common Electrical Problems
The most frequent electrical issues with Maytag microwaves involve blown fuses, faulty door switches, or issues with the power supply. A blown fuse may prevent the microwave from powering on entirely. To check this, locate the fuse in the microwave’s control panel or power cord, depending on the model. Replace the fuse with one of the same rating to restore functionality.
Another common issue involves door switches. If the door isn’t securely closed, the microwave won’t operate. Testing the door switches with a multimeter can help identify if they are functioning properly. If faulty, replacement is necessary. Additionally, inspect the power cord for any visible damage or wear. A damaged cord can cause inconsistent power delivery, leading to operational issues.
Troubleshooting Steps
Begin troubleshooting by ensuring the microwave is plugged in and the outlet is functioning. Test the outlet with another appliance to confirm there’s no issue with your home’s electrical supply. If power supply problems persist, consider checking the household circuit breaker to ensure it has not tripped.
If the microwave has power but won’t heat, inspect the magnetron and high voltage capacitor, which are critical for heating. These components can fail over time, requiring professional replacement. As always, ensure the microwave is unplugged before handling any internal parts to avoid electric shock.
In cases where self-repair seems daunting, don’t hesitate to consult a professional technician. They have the expertise to safely assess and repair electrical issues in Maytag microwaves, ensuring they’re restored to optimal working condition.

How to Clean and Maintain Maytag Appliances
Regular cleaning and maintenance are essential for ensuring the longevity and optimal performance of your Maytag appliances. Here are key steps to help you maintain your units effectively.
1. General Cleaning Tips
Always begin by unplugging the appliance for safety before cleaning. Use a soft, damp cloth to wipe down surfaces. For stubborn stains, a mild soap solution or vinegar can be effective. Avoid harsh chemicals as they may damage the finish. For stainless steel appliances, use a dedicated stainless steel cleaner to avoid streaks.
Ensure to clean the exterior regularly and check for any accumulated dust or dirt around vents and wheels. This will improve the appliance’s efficiency and prevent overheating.
2. Specific Maintenance for Different Appliances
Refrigerators: Clean the condenser coils every six months to ensure optimal cooling. Check the door seals for any cracks or gaps that may lead to energy loss.
Washers: Run a cleaning cycle with specialized washer cleaner monthly. This prevents buildup and odors. Make sure to leave the door open periodically to allow moisture to escape, reducing mildew.
Dryers: Clean the lint filter after every load to prevent fire hazards. Additionally, inspect the venting system for clogs, which can affect drying efficiency.
Ovens: Use the self-cleaning feature as recommended by the manufacturer. For manual cleaning, avoid abrasive scrubbers that can scratch surfaces. Regularly check and clean the drip pans and gaskets.
By following these cleaning and maintenance tips, you will enhance the performance and lifespan of your Maytag appliances.
When to Call a Professional for Maytag Repairs
Determining when to call a professional for Maytag appliance repairs is crucial for both safety and efficiency. If you encounter persistent issues that basic troubleshooting cannot resolve, it may be time to seek expert help.
If your appliance is making unusual noises or smells, this could indicate a serious mechanical problem or electrical fault. Ignoring these signs can lead to more significant damage or even hazardous situations.
Additionally, if you notice leaks or inconsistent performance, such as a washing machine not agitating or a refrigerator not cooling properly, the complexity of the internal components may require professional diagnosis and repair.
Another key factor is if the appliance is still under warranty. Attempting to repair it yourself could void the warranty. Professionals can ensure repairs are done correctly, maintaining warranty coverage.
It is also wise to call a professional if you lack experience or confidence in performing repairs. Safety should always be a priority, especially when working with electrical appliances. Hiring a qualified technician ensures work is done safely and correctly.
Lastly, consider the age and cost-effectiveness of the appliance. If repairs would exceed half the cost of a new unit, a professional can help you assess whether replacement is a more viable option.
Q&A — Maytag repair :
What common issues can occur with Maytag appliances?
Maytag appliances can face a variety of issues, including problems with washing machines not spinning properly, dishwashers not draining, refrigerators making unusual noises, and ovens not heating evenly. Regular maintenance can help identify these problems early. For instance, a washing machine might have a blocked drain pump or a damaged belt, while a refrigerator could have a faulty thermostat or a dirty condenser coil. Being aware of these potential issues can help you troubleshoot faster.
How can I troubleshoot my Maytag dryer if it’s not heating?
If your Maytag dryer is not heating, you can begin troubleshooting by checking a few things. First, make sure the dryer is set to a heat cycle and that the thermostat is functioning. A blocked vent can also prevent proper heating, so inspect the vent and clean it if necessary. Additionally, check the heating element and any associated fuses. If these steps do not resolve the issue, it may be time to consult a professional for further assistance.
Are there any maintenance tips to prolong the life of my Maytag dishwasher?
Maintaining your Maytag dishwasher can extend its lifespan. Start by regularly cleaning the filter to prevent clogs and ensure proper drainage. It’s also helpful to wipe down the door seals and check for any food particles that could cause leaks. Running a cleaning cycle with vinegar or a dishwasher cleaner can keep the interior fresh. Lastly, inspect the spray arms for any obstructions that could impact performance, and ensure the dishwasher is level to avoid drainage problems.
What should I do if my Maytag refrigerator is running but not cooling?
If your Maytag refrigerator is running but not cooling, check a few elements first. Ensure that the temperature settings are appropriate and inspect the condenser coils for dirt or dust buildup, as this can hinder the cooling process. Additionally, listen for any unusual noises that could indicate a malfunctioning compressor or fan. If everything appears normal but the fridge still isn’t cooling, it might be necessary to call a technician to diagnose and fix the problem.
Where can I find replacement parts for my Maytag appliance?
You can find replacement parts for your Maytag appliances at various online retailers, including the official Maytag website, which offers a parts section where you can search by model number. Major home improvement stores also carry a selection of Maytag parts. Additionally, you can check local appliance repair shops. Make sure to have your appliance model and serial numbers handy when searching for specific parts to ensure you get the right fit.
APPLIANCE REPAIR in California — fast, reliable, and affordable service that brings your home appliances back to life. Get expert help today and enjoy worry-free comfort!