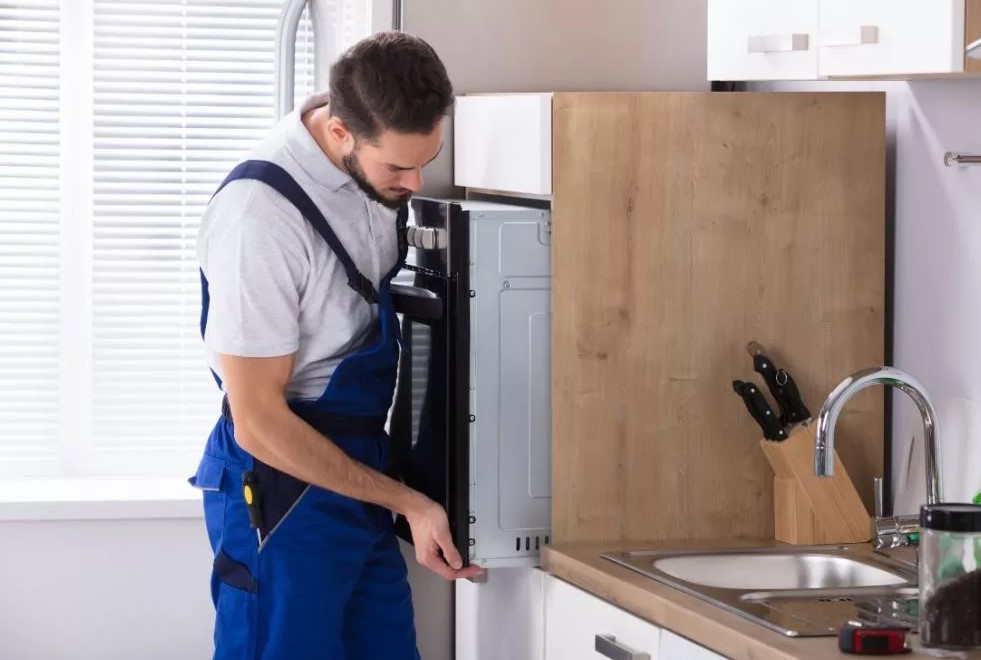
LG refrigerator repair knowledge is essential for efficient troubleshooting and fixing malfunctions, even though these refrigerators are known for their innovative designs and advanced technology, making them a popular choice for households around the globe. Like any appliance, however, they are not immune to problems. Identifying the common issues that can arise with LG refrigerators is the first step toward getting them back in working order.
One of the most frequently encountered issues is temperature inconsistency. This can manifest as either the refrigerator not cooling effectively or the freezer not maintaining the proper temperature. Understanding the underlying causes and potential solutions can save you time and money while ensuring your food remains fresh.
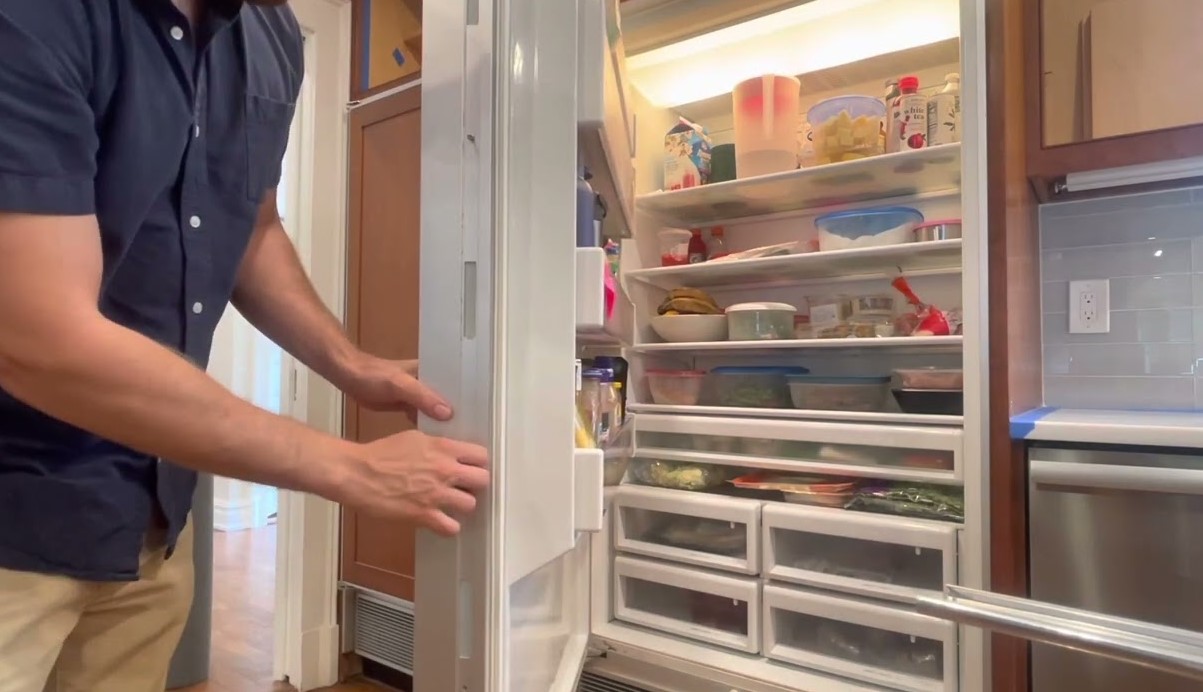
Another prevalent problem is water leakage, which can originate from a variety of sources, including clogged defrost drains or malfunctioning door seals. Addressing this issue promptly is crucial, as it can lead to water damage or mold growth if left unattended.
In this article, we will delve into the most common problems faced by LG refrigerator owners and provide step-by-step guidance on how to repair them effectively. Whether you are a seasoned DIY enthusiast or a novice, our comprehensive tips will empower you to tackle these issues with confidence.

LG Refrigerator Repair: Common Problems and How to Repair Them
LG refrigerators are known for their quality and advanced features, but they can still experience issues over time. Here are some common problems and tips on how to repair them.
1. Refrigerator Not Cooling
If your LG refrigerator is not cooling properly, the first step is to check the temperature settings. Ensure that the thermostat is set between 35°F and 38°F for optimal cooling. If the settings are correct, examine the condenser coils for dirt and dust buildup, as this can hinder performance. Clean the coils with a vacuum or a brush to remove debris.
Additionally, inspect the door seals for any damage or gaps. If the seals are not airtight, warm air can enter the fridge, affecting cooling efficiency. Replace worn or damaged seals as needed.
2. Water Leakage
Water pooling inside or underneath your LG refrigerator can be a serious problem. First, check the water supply line for kinks or leaks. Ensure that the connection to the refrigerator is tight and not damaged. If the water filter is clogged, it may cause leaks, so replace the filter according to the manufacturer’s instructions.
Also, examine the defrost drain for clogs. This drain can become obstructed with ice or debris, leading to water accumulation. Clear any blockages with warm water or a small brush.
Addressing these common issues promptly can keep your LG refrigerator running smoothly and efficiently. Always consult the user manual for specific troubleshooting guidelines and safety instructions.
Diagnosing Temperature Issues in LG Refrigerators
Temperature problems in LG refrigerators can lead to food spoilage and increased energy bills. Accurate diagnosis is essential to identify the root cause and implement effective solutions. Common symptoms include inconsistent cooling, overheating, or complete failure of the cooling system.
Common Symptoms
When diagnosing temperature issues, consider the following symptoms:
| Symptom | Possible Cause |
|---|---|
| Inconsistent cooling | Blocked air vents or malfunctioning thermostat |
| Overfreezing | Defective temperature control board or faulty defrost timer |
| Warm interior | Dirty condenser coils or damaged door seal |
| Excessive noise | Faulty compressor or worn out fan motor |
Steps to Diagnose Temperature Issues
To effectively diagnose temperature-related problems in an LG refrigerator, follow these steps:
1. Check the Thermostat: Ensure the thermostat is set to the appropriate temperature, typically around 37°F (3°C) for the fridge and 0°F (-18°C) for the freezer. If it’s set correctly but not functioning, consider replacing it.
2. Inspect Door Seals: Examine the door seals for any cracks or tears. Damaged seals can allow warm air to enter, disrupting internal temperatures. Clean the seals and, if damaged, replace them.
3. Clean the Condenser Coils: Dirty coils can hinder cooling efficiency. Locate the coils, typically found at the back or below the appliance, and clean them with a vacuum or a brush to improve airflow.
4. Assess Airflow: Check for any blockages in the air vents, which may impede proper airflow. Remove any obstructive items from inside the fridge and freezer to ensure optimal circulation.
5. Listen for Fan Operation: Ensure that the evaporator and condenser fans are running. If either fan is not operational, it may need replacement to restore proper cooling function.
By following these diagnostic steps, users can effectively identify and address temperature issues in their LG refrigerators, ensuring optimal performance and longevity.

Fixing a Leaking LG Refrigerator Water Line
Water line leaks in LG refrigerators can lead to significant damage if not addressed promptly. Identifying and fixing the issue is crucial to maintaining your appliance’s functionality. Here’s a step-by-step guide to help you resolve this common problem.
Step 1: Identify the Source of the Leak
Before starting the repair, determine where the leak is originating from. Check the water line connections at the back of the refrigerator, the valve, and the water filter area. Look for any signs of condensation, pooled water, or drips.
Step 2: Turn Off the Water Supply
To prevent further leakage, turn off the water supply to the refrigerator. This is usually done by locating the shut-off valve, which is often found under the kitchen sink or behind the refrigerator. Make sure to also unplug the refrigerator for safety.
Step 3: Inspect the Water Line
Examine the water line for any cracks, pinholes, or other types of damage. If you find any defects in the tubing, you will need to replace the section of the line that is damaged. Use a pair of pliers to disconnect the line from both the refrigerator and the water supply.
Step 4: Replace the Damaged Water Line
If the water line is damaged, purchase a compatible replacement line from a hardware store. Make sure the new line is appropriately sized for your refrigerator. Cut the new line to the required length and connect it to both the water supply and the refrigerator, ensuring a snug fit.
Step 5: Repair Connection Points
If the leak is originating from the connection points rather than the line itself, check the connections for tightness. Use a wrench to tighten any loose fittings. If the connectors appear damaged, consider replacing them as well.
Step 6: Restore Water Supply and Test
Once you have addressed the leak, turn the water supply back on and plug in your refrigerator. Monitor the connections over the next few hours to ensure there are no leaks. This step is essential to ensure that your repair has been successful.
Step 7: Seek Professional Help if Needed
If the leak persists despite your efforts or if you encounter any complex issues, it’s advisable to consult a professional technician. They can provide a thorough inspection and ensure that the problem is resolved without further risk of damage.
By following these steps, you can effectively fix a leaking water line in your LG refrigerator, restoring it to optimal working condition.
Addressing Frost Build-Up in Freezer Compartments
Frost build-up in the freezer compartment of an LG refrigerator can lead to inefficiency and freezer malfunction. Identifying the cause and implementing solutions promptly is crucial for maintaining optimal performance.
One common cause of frost accumulation is a faulty door seal. If the seal is damaged or dirty, warm air may enter the freezer, causing frost to form. To address this issue, inspect the door gasket for any cracks or tears. Clean the gasket with warm soapy water and check its integrity. If the seal is compromised, replace it to ensure a tight closure.
Another potential factor contributing to frost build-up is frequent door openings. Each time the door is opened, warm air enters, leading to frost formation. To minimize this effect, limit access to the freezer by organizing food items for quicker retrieval and maintaining a consistent temperature setting.
Additionally, the defrost timer and heater may malfunction, preventing proper defrosting. If frost continues to accumulate despite taking preventive measures, test the defrost timer and heater for functionality. If faulty, these components should be replaced to restore proper operation.
Regular maintenance can also help reduce frost issues. Periodically defrost the freezer manually by unplugging the refrigerator and allowing the frost to melt. Clean any debris from the drainage hole to ensure that melting ice can properly drain away.
In cases where excessive frost persists after trying these solutions, it may indicate a more serious issue with the appliance, such as a refrigerant leak or compressor failure. In such instances, consulting a professional technician for diagnosis and repair is recommended.
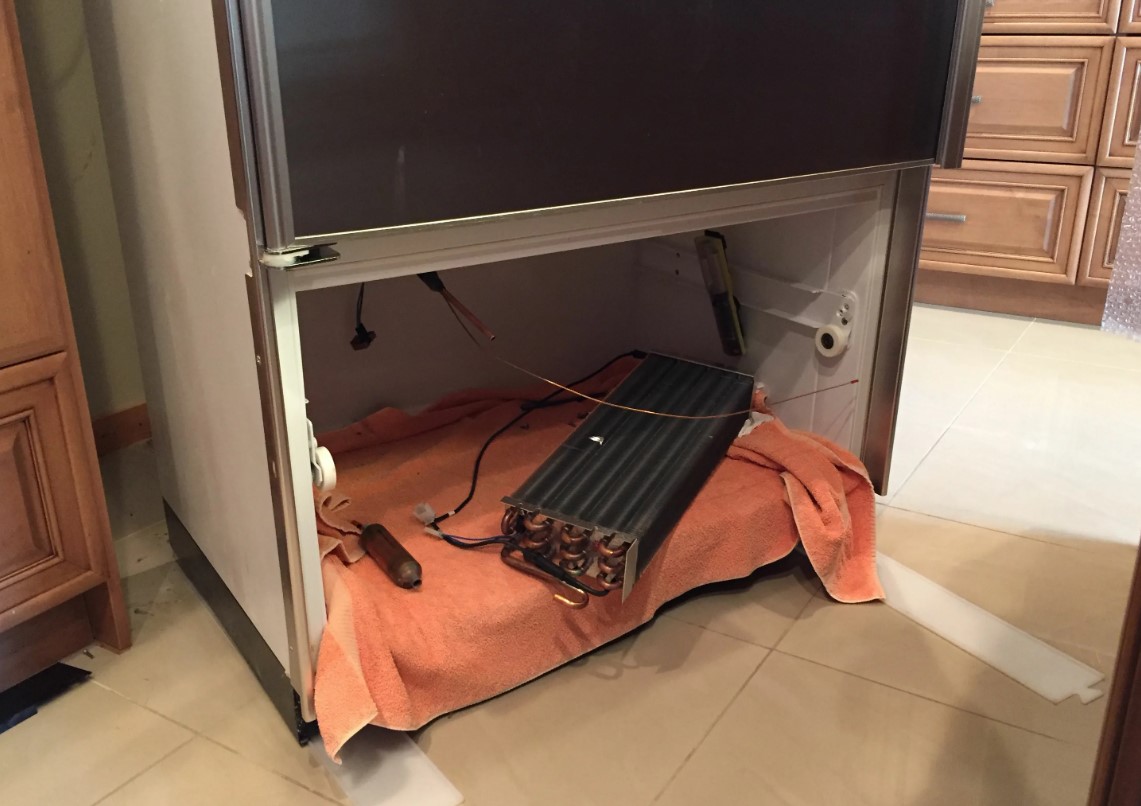
Cleaning and Maintaining the Condenser Coils
The condenser coils in your LG refrigerator play a crucial role in maintaining efficient cooling performance. Over time, dust and debris can accumulate on these coils, leading to reduced efficiency and potential breakdowns. Regular cleaning is essential to ensure your appliance operates optimally.
To clean the condenser coils, start by unplugging the refrigerator to ensure safety during maintenance. Locate the coils, typically found at the back or beneath the unit. If they are situated at the back, you may need to pull the refrigerator away from the wall for access. For models with coils underneath, you may need to remove a cover panel.
Once you have access to the coils, use a soft brush or a vacuum cleaner with a brush attachment to gently remove dust and dirt. Be careful not to damage any components while cleaning. If needed, a microfiber cloth can be used to wipe down the coils for a more thorough clean.
After cleaning, check the surrounding area for any obstructions that may block airflow. Ensure there is sufficient space between the refrigerator and the wall, allowing air to circulate freely around the coils.
As part of regular maintenance, it’s advisable to clean the coils every six months. This not only extends the lifespan of your refrigerator but also improves its energy efficiency, saving you money on utility bills. Keep an eye out for any signs of wear or damage to the coils, as these may require professional attention.
In summary, maintaining the condenser coils is a straightforward yet vital task. By incorporating this into your routine maintenance, you ensure your LG refrigerator continues to function effectively for years to come.
Resolving Noisy Operation in LG Refrigerators
Noisy operation in LG refrigerators can be a source of annoyance and concern for many users. Various factors can contribute to unusual sounds, and understanding them is key to effective troubleshooting. The most common noises include buzzing, clicking, and rattling.
Firstly, it is essential to determine the type of noise. A buzzing sound often indicates that the compressor is working hard, which is normal during cooling cycles. However, if the noise persists, check the location of the refrigerator to ensure it is not sitting unevenly on the floor. Adjusting the leveling feet can often help reduce vibrations and noise.
Clicking noises might indicate that the compressor is trying to engage but is failing. This can be due to a faulty start relay or capacitor. Inspect these components for any visible damage. If necessary, replacing the start relay or capacitor may resolve the issue.
Rattling sounds can be caused by loose components or items placed on top of the refrigerator. Ensure that all shelves and bins are secure, and remove any objects on top that might be causing vibrations. Additionally, verify that the condenser fan, located at the back or beneath the unit, is free of obstructions. Clean any debris that may be affecting its operation.
Another common source of noise is the evaporator fan, which circulates air throughout the freezer and refrigerator compartments. If the fan is obstructed by ice buildup or foreign objects, it can create a loud noise. Defrosting the coils or clearing any obstructions may be needed.
If self-diagnosis does not resolve the issue, consider consulting with a professional technician. They can accurately identify and remedy more complex problems such as compressor issues or internal part failures. Regular maintenance, such as cleaning coils and checking door seals, can also prevent future noise-related problems.

Replacing a Broken Door Seal on LG Models
A broken door seal on your LG refrigerator can lead to energy loss, reduced cooling efficiency, and higher electricity bills. Replacing the door seal is a straightforward process that can be accomplished with minimal tools and effort.
Identifying a Broken Door Seal
Before proceeding to replace the seal, it’s crucial to ensure that the door seal is indeed broken. Here are common signs of a faulty seal:
- Visible cracks or tears in the rubber gasket.
- Frost buildup inside the fridge or freezer compartment.
- Increased condensation on the exterior of the door.
- Issues with keeping the refrigerator cool.
Steps to Replace the Door Seal
Once you confirm that the door seal is broken, follow these steps to replace it:
- Purchase a Replacement Seal: Find the correct door seal for your LG model. You can check your user manual or consult the LG website for compatible parts.
- Remove the Old Seal: Start by gently pulling the old seal away from the door. If it is stuck, use a flathead screwdriver to pry it away carefully.
- Clean the Area: Wipe down the area where the seal was attached. Remove any adhesive residue or dirt to ensure a solid bond for the new seal.
- Install the New Seal: Align the new seal properly and press it into place. Ensure it fits snugly in the track to prevent air leaks.
- Test the Seal: Close the refrigerator door and check the seal’s fit. You can perform a dollar bill test by placing a dollar bill between the seal and the door. If you can pull it out easily without resistance, the seal may need adjusting.
Following these steps will ensure that your refrigerator operates efficiently and maintains optimal cooling performance. Regular maintenance of door seals can prevent future issues and extend the lifespan of your appliance.
Troubleshooting the Ice Maker Malfunction
If your LG refrigerator’s ice maker isn’t functioning properly, follow these steps to diagnose and fix common issues.
- Check the Power Supply:Ensure that the refrigerator is plugged in and that the outlet is functioning. Check the circuit breaker to confirm there are no tripped fuses.
- Inspect the Water Supply:Make sure that the water supply line is connected securely and that there are no kinks or blockages. Flush the line by running water through it, if necessary.
- Examine the Ice Maker Settings:Check if the ice maker is turned on. Refer to the user manual for specific instructions on how to adjust the settings.
- Look for Clogs:Inspect the ice mold and dispenser for any ice build-up or clogs that may prevent operation. Clear out any obstructed areas carefully.
- Monitor Temperature Settings:Ensure that the refrigerator temperature is set between 0°F and 5°F (-18°C to -15°C) for optimal ice production. Adjust the thermostat if necessary.
- Test the Water Filter:If your refrigerator has a water filter, verify whether it needs replacement. A clogged filter can reduce water flow to the ice maker.
- Listen for Sounds:When the ice maker is activated, it should make a low humming sound. If you hear unusual noises, this might indicate a mechanical failure.
- Inspect the Ice Maker Assembly:In cases where the above steps do not resolve the issue, check for any visible damages or loose connections in the ice maker assembly.
- Reset the Ice Maker:Some models have a reset button. Press it to reset the ice maker. Wait a few hours to see if it resumes normal operation.
If after these troubleshooting steps your ice maker still doesn’t work, it may be necessary to consult a professional technician for further diagnosis and repair.
Fixing a Faulty Thermostat in LG Refrigerators
A malfunctioning thermostat is a common issue in LG refrigerators, which can lead to improper temperature regulation. This problem often manifests as food spoiling too quickly or the refrigerator freezing items that should remain fresh. Diagnosing and fixing a faulty thermostat can restore your refrigerator’s efficiency.
To begin the repair process, unplug the refrigerator to ensure safety. Locate the thermostat, typically found inside the fridge compartment, attached to the control panel or near the evaporator coils. Removing the thermostat will require a screwdriver; carefully detach any screws holding it in place.
Once the thermostat is removed, inspect it for visible signs of damage or corrosion. If the component appears broken or the wiring is frayed, replacement is necessary. You can purchase a compatible thermostat from an appliance parts store or online, ensuring it matches your specific LG refrigerator model.
Before installing the new thermostat, test the old one for functionality. Use a multimeter to check for continuity; if the meter shows no readings, the thermostat is indeed faulty. To install the new unit, follow the manufacturer’s instructions closely, securing it in place and reconnecting any wires as needed.
After the new thermostat is installed, plug the refrigerator back in and adjust the temperature settings. Monitor the appliance for a few hours to ensure it operates correctly. If cooling is restored, the repair is complete. If issues persist, additional troubleshooting may be required, possibly involving other components such as the compressor or the temperature sensor.
Regular maintenance and monitoring can help prevent thermostat issues in the future, ensuring your LG refrigerator remains in optimal working condition.
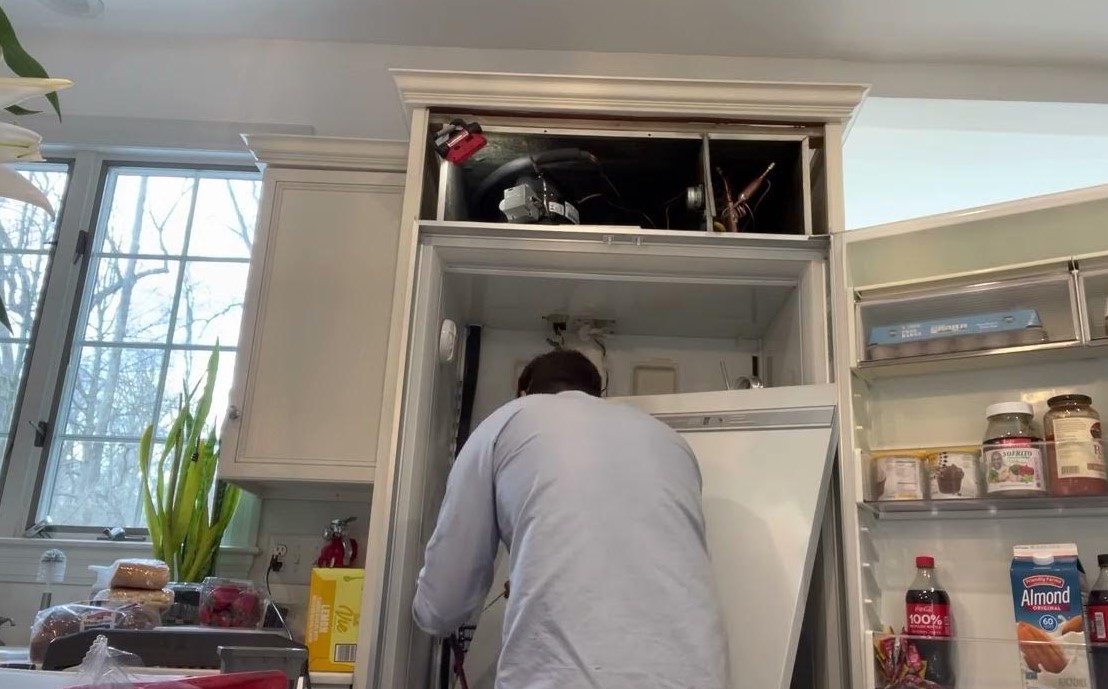
Understanding the Role of the Evaporator Fan
The evaporator fan is a crucial component in LG refrigerators, primarily responsible for circulating cold air throughout the refrigerator and freezer compartments. Its main function is to ensure that the temperature is consistent across all shelves, preventing hot spots that can lead to food spoilage.
Located near the evaporator coils, the evaporator fan draws cold air produced by the evaporator coil and distributes it evenly. This process not only helps to maintain optimal cooling but also promotes efficient energy use, which can save on electricity bills. A well-functioning evaporator fan is essential for the overall performance of the refrigerator.
When the evaporator fan malfunctions, various problems can occur. One of the most common signs of a defective fan is inadequate cooling, which may result in food items not being properly preserved. Additionally, if the fan is noisy, it signals that it may be getting obstructed or failing due to wear and tear.
Maintenance of the evaporator fan is vital for the longevity of the refrigerator. Regularly checking for blockages, such as frost buildup or debris, can help prevent performance issues. In cases where repairs are needed, it may involve defrosting the fan compartment or replacing the fan altogether if it is deemed irreparable.
Understanding the role of the evaporator fan assists in diagnosing potential issues within your LG refrigerator. Prompt attention to fan-related problems can ensure that your appliance operates efficiently and prolong its lifespan.
Dealing with Error Codes on LG Refrigerator Displays
LG refrigerators are equipped with advanced technology that can display error codes when a problem arises. Understanding these codes is crucial for diagnosing issues and ensuring your appliance operates efficiently. Here are some common error codes you may encounter and guidance on how to address them.
Common LG Refrigerator Error Codes
- E-1 or E-2: These codes indicate a problem with the refrigerator’s temperature sensors. Check if the sensors are properly connected and clean them if necessary.
- D-1 or D-2: These errors refer to defrosting issues. Ensure that the defrost heater is working and that there are no obstructions in the defrost drain.
- FF: This code suggests a fault in the fan motor. Inspect the fan for any blockages or damages and replace it if needed.
- HC: Indicates a high-temperature error. Verify that the door seals are intact and that the refrigerator is not overloaded.
- PF: This error indicates a power failure. After power is restored, the refrigerator may need to be reset. Unplug it for a few minutes and then plug it back in.
Steps to Resolve Error Codes
- Consult the user manual for your specific LG refrigerator model to find the exact meaning of the displayed error code.
- Before attempting any repairs, ensure the refrigerator is unplugged for safety.
- Check for basic issues such as blocked vents, loose connections, or trapped food that might be causing the errors.
- If the issue persists, consider running a self-diagnosis if your model supports this feature. Follow the instructions in the manual to initiate the process.
- If troubleshooting does not resolve the error, it may be time to contact a professional technician for further assistance.
Regular maintenance and prompt attention to error codes can extend the lifespan of your LG refrigerator and ensure its optimal performance. Keeping an eye on the display can save you from more significant issues down the line.
Restoring Power to a Non-Responsive LG Refrigerator
If your LG refrigerator is not responding, it may indicate a loss of power. This issue can stem from a variety of problems, including a tripped circuit breaker, a faulty power cord, or issues with the electrical outlet. Here are the steps to diagnose and potentially restore power to your appliance.
| Step | Description |
|---|---|
| 1. Check Power Source | Inspect the electrical outlet where the refrigerator is plugged in. Ensure it is functioning properly by plugging in another device and checking if it powers on. |
| 2. Inspect Power Cord | Look for any visible damage or wear on the power cord. If the cord is frayed or damaged, it will need replacement. |
| 3. Reset Circuit Breaker | Locate your home’s circuit breaker panel and check if the breaker associated with the refrigerator has tripped. If it has, reset it by flipping the switch off and then back on. |
| 4. Verify It’s Not Overloaded | Ensure that the outlet is not overloaded with other appliances, as this can contribute to tripped breakers. Limit usage to the refrigerator where possible. |
| 5. Check Door Seals | Though not related to power directly, inspect door seals to ensure the refrigerator is not overheating due to air loss, which can affect performance. |
| 6. Internal Power Issues | If all external checks are clear, there may be an internal issue. Contact a professional technician if the unit remains unresponsive after these steps. |
Following these steps can help diagnose the underlying problem with your LG refrigerator’s power issue. If you’ve exhausted all options without resolution, seeking professional assistance is recommended to ensure safe repair.
Q&A — LG refrigerator repair:
What are some common issues with LG refrigerators?
Common problems include issues with cooling, unusual noises, water leakage, ice buildup in the freezer, and malfunctioning doors. Each of these problems can stem from various causes, such as a faulty thermostat, a blocked drain, or worn-out seals.
How can I fix a cooling problem in my LG refrigerator?
If your refrigerator is not cooling properly, first check the temperature settings. Ensure they are set correctly, typically between 37°F (3°C) for the fridge and 0°F (-18°C) for the freezer. If settings are fine, inspect the door seals for damage or debris that may prevent airtight closure. Lastly, clean the condenser coils; dust and dirt can hinder performance.
What should I do if my LG refrigerator is making strange noises?
Unusual noises might indicate issues with the fan or the compressor. Start by checking if there are any items touching the fan. If nothing seems obstructed, it may require professional service to assess the compressor or other internal components. Regular maintenance can also prevent such noises from developing.
Why is there water pooling at the bottom of my LG refrigerator?
Water pooling typically results from a clogged defrost drain. To fix this, locate the drain, which is usually found at the back or bottom of the fridge. Clear any debris using warm water or a pipe cleaner. If the issue persists, check the water inlet valve; it may be malfunctioning.
How do I prevent ice buildup in my LG freezer?
Ice buildup can be caused by excessive moisture or a malfunctioning door seal. Ensure the door closes tightly and check the seals for any cracks. Adjusting the temperature settings or defrosting the freezer regularly can also help minimize ice accumulation. If these measures do not resolve the issue, consider inspecting the defrost heater or thermostat.
What are the most common problems that LG refrigerators face?
LG refrigerators can experience several issues that may affect their performance. Common problems include: inadequate cooling, which may be caused by dirty condenser coils or a malfunctioning thermostat; water leaks that can result from a clogged defrost drain; unusual noises that may indicate a problem with the compressor or fan; and ice buildup in the freezer, often due to a faulty door seal. Each of these issues can disrupt the normal operation of the refrigerator, leading to food spoilage or inconvenience.
How can I repair my LG refrigerator if it is not cooling properly?
If your LG refrigerator is not cooling, start by checking the following: First, ensure that the temperature settings are correct; they should typically be set at 37°F (3°C) for the refrigerator and 0°F (-18°C) for the freezer. Next, inspect the condenser coils, located at the back or beneath the appliance, for dust buildup and clean them with a soft brush or vacuum. Make sure the door seals are intact, as a damaged seal can allow warm air in. If the problem persists, test the thermostat and compressor. If you’re uncomfortable with DIY fixes, it’s advisable to consult a technician for a thorough diagnosis and repair.
APPLIANCE REPAIR in California — fast, reliable, and affordable service that brings your home appliances back to life. Get expert help today and enjoy worry-free comfort!