Appliance installation plays a pivotal role in enhancing both the functionality and comfort of your home when upgrading. Whether you’re adding a smart refrigerator, a high-efficiency washer, or a state-of-the-art dishwasher, understanding the necessary steps and precautions for the setup process is essential. This article will guide you through key considerations to ensure a smooth installation and optimal performance.
First and foremost, proper preparation is critical. Before the arrival of your new appliances, it is advisable to measure the designated spaces carefully. Dimensions should account for not only the appliance size but also the surrounding areas for ventilation and ease of movement. Additionally, reviewing the manufacturer’s installation requirements can prevent potential issues and guarantee compliance with safety standards.
Another significant factor to consider is the compatibility of your existing infrastructure. Check electrical, plumbing, and gas connections, as well as any specific requirements your new appliances may have. If modifications are needed, it’s wise to consult a professional to ensure everything meets local building codes and operates efficiently.
In conclusion, taking the time to thoroughly prepare for appliance installation will lead to a more efficient and hassle-free experience. Understanding the requirements and potential challenges allows homeowners to enjoy their new appliances to the fullest, optimizing both convenience and energy savings.

Appliance Installation: What You Need to Know Before Setting Up New Appliances
Installing new appliances can be an exciting yet challenging task. Proper setup ensures that your devices operate efficiently and safely. Here are key aspects to consider before proceeding with the installation:
1. Read the Instruction Manual: Each appliance comes with a specific instruction manual that outlines necessary installation procedures. Familiarize yourself with these guidelines to avoid mistakes.
2. Electrical and Plumbing Requirements: Ensure that your home’s electrical systems and plumbing can support the new appliance. Check voltage and amperage requirements, and confirm if any plumbing modifications are needed.
3. Space and Ventilation: Measure the space where the appliance will be placed. Make sure there is enough room for ventilation, where applicable, to prevent overheating or other issues.
4. Safety Standards: Adhere to local building codes and safety standards. This may include using specific outlets for refrigerators or ensuring proper gas line installation for stoves.
5. Tools and Equipment: Gather all necessary tools before you begin. Common tools include screwdrivers, pliers, and wrenches. Having everything ready ensures a smoother installation process.
| Appliance Type | Common Installation Requirements |
|---|---|
| Refrigerator | Level surface, proper electrical outlet, water line for ice maker |
| Washing Machine | Hot and cold water connections, drainage access, electrical outlet |
| Dishwasher | Water supply line, drainage connection, electrical outlet |
| Oven/Range | Proper gas/electric connections, adequate clearance, ventilation |
6. Professional Help: If unsure about any installation aspect, consider hiring a professional. This can prevent damage to the appliance or your home and ensure optimal functionality.
By paying attention to these details, you can ensure a successful installation and enjoy your new appliance fully functional and reliable.
Understanding Electrical Requirements for New Appliances
When installing new appliances, it’s crucial to understand the electrical requirements specific to each device. Each appliance has different voltage, amperage, and power output needs, which can impact your home’s electrical system. Addressing these requirements ensures safe and efficient appliance performance.
Voltage and Amperage Ratings
Appliances generally operate on either 120V or 240V systems. Smaller devices, like microwaves and toasters, typically use standard 120V outlets. In contrast, larger appliances such as ovens, dryers, and HVAC units often require a 240V outlet. In addition to voltage, consider the amperage rating, which indicates the amount of electrical current the appliance will draw. This information is critical to prevent overloads or circuit failures.
Dedicated Circuits and Wiring Considerations
Many high-power appliances necessitate dedicated circuits to operate safely. A dedicated circuit means that the appliance has a direct line to the electrical panel, minimizing the risk of circuit overloads. Ensure that the wiring gauge is appropriate for the appliance’s amperage requirements; insufficient wiring can lead to overheating and potential fires. Consulting a licensed electrician can help determine if your existing electrical system meets the specifications required for new appliances.
Assessing Space and Measurements for Proper Fit
Before installing new appliances, it is crucial to assess the available space and take accurate measurements to ensure a proper fit. Begin by determining the designated area for the appliance. This involves clearing the space of any obstructions and measuring its dimensions accurately.
Use a measuring tape to record the width, height, and depth of the allocated area. Be sure to account for any protruding elements such as cabinets, countertops, or walls that may affect the installation. Additionally, note the distance from nearby fixtures, electrical outlets, and plumbing connections, as these will influence the type of appliance you can install.
When measuring, consider the manufacturer’s specifications for the appliance you wish to install. Most appliances come with required space specifications that ensure proper ventilation and functionality. For instance, refrigerators typically need extra space around the sides for airflow, while ovens may require clearance from adjacent cabinetry.
If you’re replacing an existing appliance, measure its dimensions and compare them to the new model. Keep in mind that different brands and models may have variations in size even within the same category. Ensure that the new appliance can fit comfortably into the space without compromising accessibility.
Additionally, take into account the door openings and any pathways the appliance will need to fit through. Measure the width of doorways and hallways leading to the installation site. If the new appliance has features like handles or a front panel that requires additional clearance, include that in your measurements as well.
Lastly, if the appliance requires a specific installation setup, such as leveling or connecting to plumbing or electrical systems, choose a location that facilitates those needs. This attention to detail will save time and reduce complications during the installation process.
By carefully assessing the space and undertaking precise measurements, you ensure a seamless installation of your new appliances, preventing potential issues and enhancing overall functionality.
Identifying Necessary Tools for Appliance Installation
Before you begin the installation of new appliances, having the right tools on hand is crucial for a successful setup. Here is a comprehensive list of essential tools you may need for most appliance installations.
Basic Tools
The basic toolbox should include items that are commonly required for various installations. A standard screwdriver set with both flathead and Phillips screwdrivers is essential for securing different components. Pliers, particularly adjustable and needle-nose pliers, can help in gripping, twisting, and cutting wires. A tape measure is invaluable for ensuring that your appliances fit into designated spaces properly. Additionally, a level is necessary to make sure that your appliance is installed evenly, which is especially important for refrigerators and washers.
Specialized Tools
Depending on the appliance type, you might need specialized tools. For instance, if you’re installing a dishwasher, you’ll need a basin wrench to tighten plumbing fittings in tight spaces. Additionally, a power drill can speed up the process when it comes to creating pilot holes or driving screws. For electrical appliances, having a multimeter on hand allows you to check voltage and ensure safe electrical connections. Lastly, a utility knife or wire strippers might be necessary if you’re working with electrical or plumbing installations.

Safety Precautions to Take Before Starting Installation
Before beginning the installation of new appliances, it is crucial to prioritize safety to prevent accidents and damage. Here are essential precautions to consider:
1. Read the Manual: Always start by thoroughly reading the user manual provided by the manufacturer. It contains vital information specific to the appliance regarding installation requirements, safety tips, and troubleshooting advice.
2. Check Utility Connections: Ensure that the electrical, gas, or plumbing connections required for the appliance are up to code and compatible. Inspect for any leaks, frays, or damages in wiring and pipes.
3. Gather the Right Tools: Equip yourself with the necessary tools before starting the installation. Having the right tools can enhance safety and efficiency. Common tools include screwdrivers, wrenches, a level, and safety gear.
4. Wear Protective Gear: Safety goggles, gloves, and closed-toe shoes are recommended to protect against injury from sharp edges, heavy items, and potential electrical hazards.
5. Clear the Area: Ensure the installation area is clean and free of obstacles. Remove any clutter, furniture, or items that could pose a tripping or falling hazard.
6. Use Appropriate Lifting Techniques: Appliances can be heavy. When lifting, use proper techniques to avoid strain. Bend your knees, keep your back straight, and lift with your legs. If necessary, use a dolly or ask for assistance.
7. Inspect the Appliance: Before installation, check the appliance for any visible damage or defects. Do not proceed if you notice any issues–contact the retailer or manufacturer for support.
8. Ensure Adequate Ventilation: Appliances like ovens, dryers, and refrigerators require proper ventilation. Ensure the installation site allows for sufficient airflow to prevent overheating and enhance efficiency.
| Precaution | Description |
|---|---|
| Read the Manual | Understand the specific installation requirements and safety tips. |
| Check Utility Connections | Verify compatibility and inspect for any hazards in connections. |
| Gather the Right Tools | Prepare essential tools for a safe and efficient installation. |
| Wear Protective Gear | Use goggles, gloves, and sturdy footwear to minimize risk. |
| Clear the Area | Remove obstacles to prevent tripping during installation. |
| Use Appropriate Lifting Techniques | Lift with your legs and seek help for heavy items. |
| Inspect the Appliance | Check for damages before commencing installation. |
| Ensure Adequate Ventilation | Allow for sufficient airflow to prevent overheating. |
Water Supply Connections for Appliances Requiring Plumbing
When installing appliances that require plumbing, such as dishwashers, washing machines, or refrigerators with ice makers, proper water supply connections are essential for functionality and safety. This section outlines the critical steps needed to ensure a secure and reliable water connection to your appliances.
Understanding Water Supply Requirements
Each appliance has specific water supply requirements regarding pressure and flow rate. Before proceeding with installation, consult the manufacturer’s manual for detailed specifications. Commonly, most appliances require a cold water supply, while some, like washing machines, may require both hot and cold connections. Ensure that your plumbing system can meet these requirements.
Additionally, check the compatibility of the connection size. Most modern appliances utilize standard connections, typically 1/2-inch or 3/4-inch pipe fittings. However, older homes may have different sizes, necessitating adapters or new fittings.
Installation Steps for Water Supply Connections
1. Shut Off the Water Supply: Before beginning the installation, shut off the main water supply to avoid leaks and flooding. This is crucial during installation or when making any plumbing changes.
2. Locate Water Supply Lines: Identify the nearest water supply lines that will connect to your appliance. These lines should be easily accessible and in good condition. If the lines show signs of corrosion or damage, consider replacing them before installation.
3. Make the Connection: Using the appropriate hoses and fittings, connect the appliance to the water supply. Most appliances come with hoses designed for quick connect installations. Ensure all connections are tight and secure, using plumber’s tape to prevent leaks.
4. Test for Leaks: Once everything is connected, turn the water supply back on slowly. Watch for any leaks at the connection points. If you notice any drips or leaks, turn off the water supply again and tighten the fittings as needed.
5. Secure the Appliance: Finally, make sure the appliance is securely in place and all connections are properly sealed. Check for any additional installation instructions specific to your appliance to ensure optimal operation.
By following these guidelines for water supply connections, you can ensure that your appliances function correctly and efficiently, minimizing the risk of leaks and other plumbing issues in your home.
Gas Line Considerations for Gas Appliances
When installing gas appliances, proper handling of gas lines is crucial for safety and efficiency. Here are essential considerations to keep in mind:
- Compliance with Local Codes: Always check local building codes and regulations regarding gas line installations. These codes may dictate the type of materials, installation techniques, and safety measures that must be followed.
- Professional Installation: It is highly recommended to hire a licensed professional for the installation of gas lines and appliances. Professionals possess the expertise to ensure connections are safe and compliant with regulations.
- Material Requirements: Gas lines can be made from various materials, such as black iron, copper, or flexible gas line. Ensure the materials used are approved and suitable for your specific gas appliance.
- Proper Sizing: Gas lines must be properly sized to accommodate the specific needs of your appliance. Insufficient gas pressure can lead to poor appliance performance, while oversized lines can be wasteful.
- Turn Off Gas Supply: Before making any changes to existing gas lines or appliances, always turn off the main gas supply to prevent leaks and ensure safety during installation.
- Leak Testing: After installation, conduct a thorough leak test using a gas leak detection solution or soapy water. Look for bubbles, which indicate the presence of leaks, and address any issues before using the appliance.
- Ventilation Needs: Ensure proper ventilation for gas appliances to prevent the buildup of harmful gases. Follow manufacturer guidelines regarding clearance and airflow around the appliance.
- Regular Maintenance: Schedule regular inspections and maintenance for gas lines and appliances to ensure they remain in good operating condition and to identify potential issues early.
Following these guidelines will enhance the safe setup of gas appliances and minimize risks associated with gas line installations.
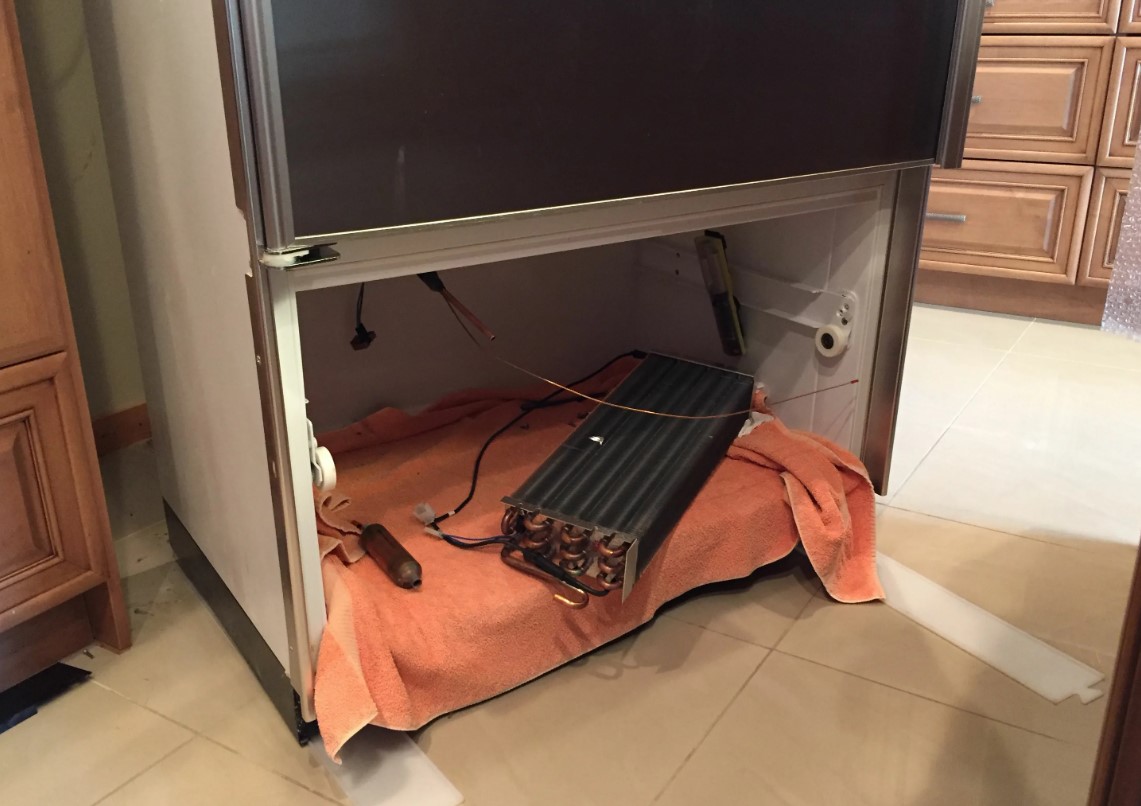
Leveling and Stabilizing Your New Appliances
Properly leveling and stabilizing your appliances is crucial for their optimal performance and longevity. Uneven appliances can lead to ineffective operation, increased wear and tear, and potential safety hazards. This guide will walk you through the essential steps to ensure your new appliances are set up correctly.
Before installation, gather the necessary tools, including a level, adjustable wrench, and a screwdriver. Begin by placing the appliance in its designated position. Ensure there is enough space around the appliance for ventilation and easy access to utilities.
Use a level to check the appliance for horizontal balance. If the appliance is not level, adjust the legs or feet accordingly. Many appliances come with adjustable leveling feet that can be raised or lowered to achieve proper alignment. Turn the legs clockwise to raise and counterclockwise to lower them.
For appliances like refrigerators and washers, it is essential to stabilize them to prevent excessive vibrations. Ensure all four corners of the appliance are firmly on the ground. If necessary, use shims or rubber pads under the feet to address uneven surfaces.
After leveling, check that the appliance door opens and closes smoothly. A misaligned door could indicate that the appliance is not properly leveled. If you encounter issues, recheck the leveling adjustments.
Finally, once the appliance is level and stable, perform a test run to ensure it operates correctly. Monitor for any unusual noises or movements during operation. Properly leveled appliances not only function better but also enhance the safety of your home and extend the appliance’s lifespan.
Connecting to Wi-Fi for Smart Appliances
Connecting your smart appliances to Wi-Fi is essential for accessing their full range of features and functionalities. Most smart appliances, such as refrigerators, ovens, and washing machines, can be controlled remotely via dedicated mobile applications, which require an internet connection. Here’s what you need to know before setting them up.
Preparation Steps
Before initiating the connection, ensure you have a stable Wi-Fi network. Check the appliance specifications to determine the required frequency band; many smart appliances operate on the 2.4 GHz band, while some may also support 5 GHz. Position your router within range of the appliance to avoid connectivity issues.
Next, download the manufacturer’s app on your smartphone or tablet. This app will guide you through the connection process. Create an account or log in if you already have one. Familiarize yourself with the app’s interface, as most settings and controls will be managed here.
Connection Process
To connect the appliance, power it on and initiate the setup mode, which can usually be done by holding a designated button or following on-screen prompts. The appliance will search for available Wi-Fi networks; select your home network and enter the password when prompted. Ensure the password is entered correctly, as even a minor mistake can prevent connection.
After a successful connection, your appliance should sync with the app. Follow any additional instructions provided by the app to complete the setup. It’s advisable to run a quick test to ensure that the appliance responds to commands from your mobile device. Regularly check for software updates to keep your appliance running smoothly and securely.
Testing Functionality After Installation
Once you have successfully installed your new appliance, it is crucial to test its functionality to ensure everything is operating correctly. This process helps to identify any issues that may have arisen during installation or manufacturing, allowing you to address them promptly.
Start by checking the appliance’s power supply. For electric appliances, confirm that they are receiving energy by verifying that the power cord is properly plugged in and that any circuit breakers are functioning. For gas appliances, ensure that gas connections are secure and that there are no leaks by applying a soapy water solution to the joints–bubbles will indicate a leak.
Next, run a preliminary cycle or operation based on the appliance type. For instance, if it’s a washing machine, load it with a few items and select a short wash cycle. For a refrigerator, monitor the cooling process for a few hours. Pay attention to unusual sounds or smells, as these can signal problems.
Test all functionalities specific to the appliance. If it’s an oven, check the heating elements at different temperatures. For a dishwasher, ensure that all wash cycles function correctly and observe the drainage process. Performing these tests will help ensure that every component is working as intended.
If you encounter any issues during testing, consult the user manual for troubleshooting steps. Should problems persist, contacting customer support or a professional technician may be necessary to avoid further complications.
Document your testing results, as this can be helpful for any future service or warranty claims. Taking the time to verify the functionality of your new appliance can save you from potential inconveniences down the line.
Dealing with Existing Appliance Removal and Disposal
When introducing new appliances into your home, managing the removal and disposal of existing devices is a crucial step. Improper handling of old appliances can lead to various issues, including environmental damage and potential safety hazards. Here’s what you need to know about the process.
Assess the Type of Appliance
Different appliances require different disposal methods. Identify whether your old appliance is:
- Small Appliances: These include items like microwaves, toasters, and blenders, which can often be disposed of through regular trash or recycling programs.
- Major Appliances: Larger items such as refrigerators, washers, and dryers need special handling due to their size and potential hazardous materials.
Removal and Disposal Options
Here are some common methods to handle the removal and disposal of old appliances:
- Retailer Take-Back Programs: Many retailers offer take-back services when delivering new appliances. This can simplify the process significantly.
- Local Waste Management Services: Check with your local waste management facility for scheduled bulky item pick-up times and specific disposal options.
- Donation: If the appliance is still functional, consider donating it to local charities or non-profit organizations. Many will pick up items directly from your home.
- Recycling Centers: Specialized recycling centers accept old appliances for environmentally friendly disposal. Look for certified e-waste or recycling locations in your area.
- Professional Junk Removal Services: Hiring a junk removal company can save time and effort, ensuring that appliances are disposed of properly.
Before removal, ensure that any sensitive data is wiped from appliances that store personal information, like refrigerators with screens or connected devices. Additionally, always check local regulations to ensure compliance with laws regarding appliance disposal.
In summary, dealing with the removal and disposal of existing appliances requires careful consideration of types, methods, and local regulations. By approaching this process responsibly, you’ll contribute to environmental sustainability while ensuring a smooth transition to your new appliances.
Tips for Reading and Understanding Appliance Manuals
Appliance manuals are essential resources that provide crucial information for proper setup, maintenance, and troubleshooting. Here are some strategies to effectively read and understand these documents:
- Start with the Table of Contents: This section provides a structured overview of the manual. Use it to locate specific sections quickly.
- Familiarize Yourself with the Terminology: Manuals often include technical terms. Make note of important terms and their definitions to enhance understanding.
- Read Safety Instructions First: Always prioritize safety guidelines to avoid accidents or damage during installation and use.
- Follow Installation Guides Step-by-Step: Adhere to the instructions sequentially to ensure proper installation. Skipping steps can lead to complications.
- Refer to Diagrams and Illustrations: Visual aids can clarify complex instructions. Pay attention to labels and symbols that correspond to parts and processes.
- Take Notes: Jot down important points or steps, especially those that are unclear or require further attention during the installation process.
- Review Troubleshooting Sections: Familiarize yourself with common issues and solutions provided in the troubleshooting guide to address potential problems effectively.
- Access Online Resources: Many manufacturers offer additional online resources. These can complement the manual and provide video tutorials or FAQs.
By employing these strategies, you can better navigate appliance manuals, ensuring a smoother installation and operation experience.
When to Seek Professional Installation Services
Determining whether to tackle appliance installation as a DIY project or hire a professional can greatly impact the efficiency and safety of your new appliances. It is crucial to recognize specific scenarios where professional installation services are highly recommended.
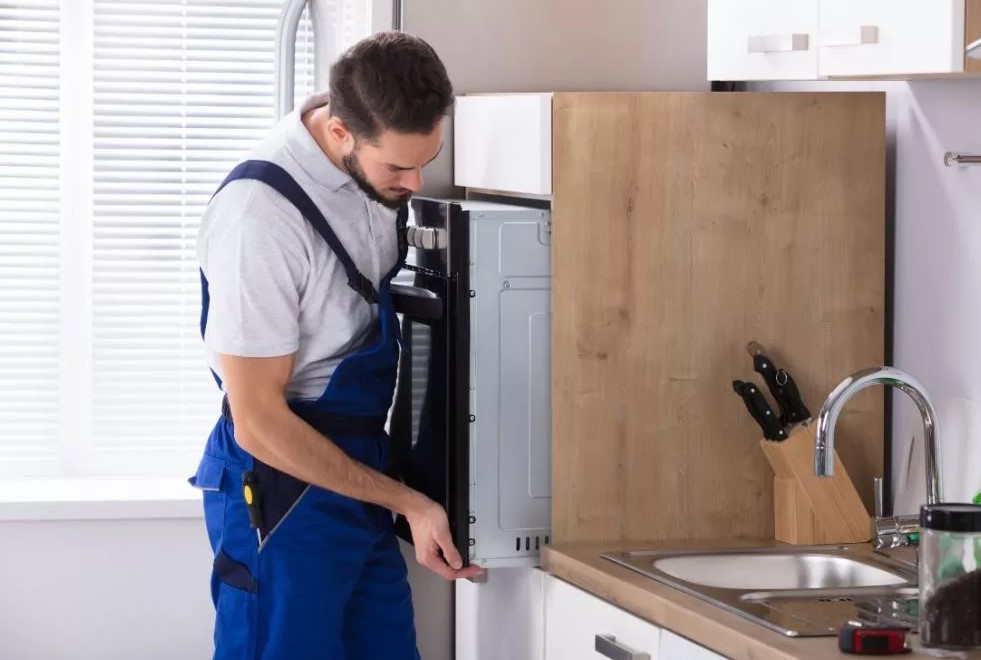
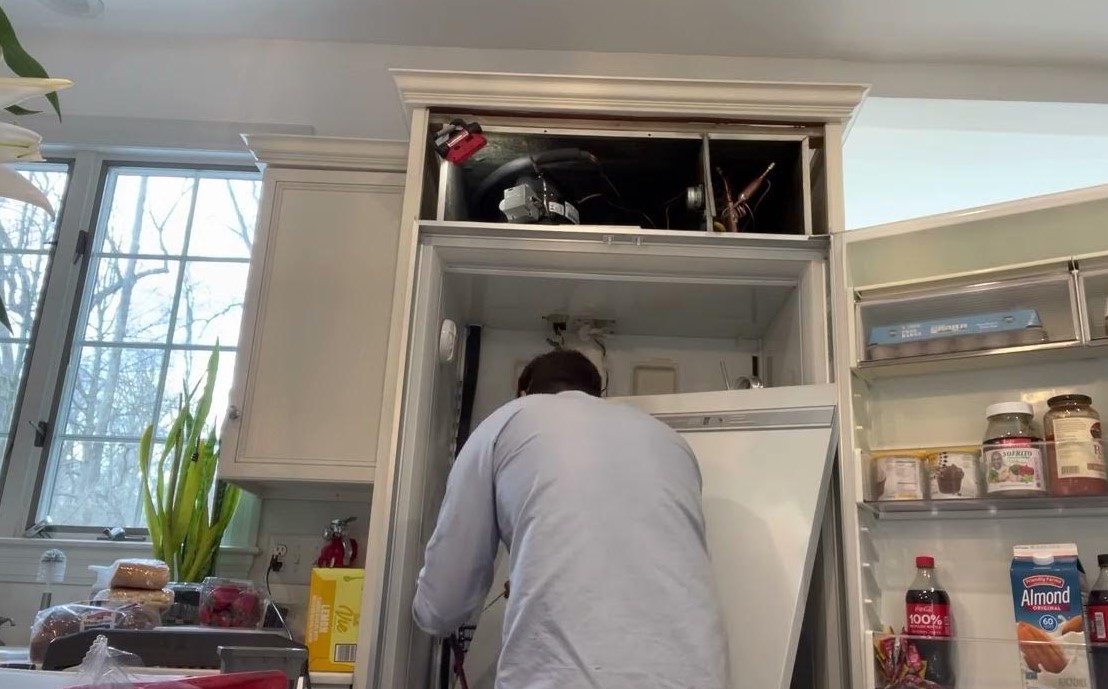
1. Complex Installations: If you’re dealing with intricate appliances such as built-in ovens or integrated dishwashers, the installation process can be complicated. These units often require precise measurements, adjustments, and the installation of cabinetry. Professionals have the expertise to handle these complexities efficiently.
2. Electrical and Plumbing Connections: Appliances that need electrical wiring or plumbing adjustments pose safety risks if mishandled. If your new appliance requires significant electrical work or plumbing modifications, it is wise to seek professionals who are licensed and experienced in these areas to avoid hazards.
3. Warranty Considerations: Many manufacturers stipulate that professional installation is a requirement for maintaining warranty coverage. Failing to hire a certified technician could void your warranty, leading to costly repairs down the road. Always review warranty guidelines before proceeding with DIY installation.
4. Limited Experience: If you lack experience with appliance installation, it may be prudent to hire a professional. Even seemingly simple appliances can present challenges that require specialized knowledge. A trained technician will ensure proper installation, reducing the likelihood of future issues.
5. Time Constraints: If your schedule is tight and you cannot dedicate the necessary time for a thorough installation, hiring a professional can save you time. Professionals can complete the installation quickly and efficiently, allowing you to start using your new appliance sooner.
6. Safety Concerns: Appliances such as gas stoves or dryers can pose fire hazards if improperly installed. If you have any concerns about the safety of your installation, it is best to consult with a professional who understands the risks involved and can ensure that everything is set up according to safety standards.
In summary, seeking professional installation services is advisable in scenarios involving complexity, safety risks, warranty implications, lack of experience, time constraints, and safety concerns. By recognizing these situations, you can make informed decisions that protect your investment and ensure the optimal performance of your appliances.
Q&A — Appliance installation:
What are the basic steps to follow when installing a new appliance?
To install a new appliance, begin by unboxing it and checking for any damage or missing parts. Next, read the manufacturer’s manual for specific installation instructions. Ensure a suitable power supply or plumbing connection is in place before proceeding. Position the appliance correctly in the designated space, making sure it’s level. Finally, connect any power sources or plumbing and test the appliance to ensure it’s working properly.
Do I need to hire a professional for appliance installation?
The need to hire a professional largely depends on the complexity of the installation and your comfort level with DIY tasks. For simpler appliances like microwaves or refrigerators, you may manage the installation yourself with the proper tools. However, if the installation involves plumbing or electrical work, it’s advisable to consult a qualified professional to ensure safety and compliance with local codes.
What tools are typically required for appliance installation?
The tools needed can vary based on the type of appliance, but common tools include a screwdriver set, a wrench, a level, and pliers. You might also need a drill for mounting some appliances and a tape measure for ensuring the correct fit in your space. Always check the installation manual for any specific tools recommended by the manufacturer.
Are there specific safety precautions I should take during installation?
Safety during installation is paramount. Always ensure the appliance is unplugged or disconnected from its power source before beginning. If working with gas appliances, check for leaks after installation. Wear appropriate safety gear, such as gloves and goggles, especially when manipulating heavy items or using power tools. Lastly, keep the workspace clear of clutter to prevent accidents.
What should I do if my new appliance doesn’t work after installation?
If your new appliance doesn’t function after installation, first check the user manual for troubleshooting steps. Make sure the appliance is plugged in and that any necessary switches are turned on. Inspect the connections for power or water supply. If there’s still a problem, consult customer support or a qualified technician, as attempting further repairs yourself may void the warranty or cause additional damage.
What are the initial steps I should take before installing a new appliance?
Before installing a new appliance, it’s important to assess the space where it will be placed. Measure the area to ensure the appliance will fit properly, and check for any obstructions like cabinets or electrical outlets. You should also review the installation manual provided by the manufacturer, as it often contains specific guidelines for setup. Ensure you have all necessary tools on hand, such as screwdrivers, wrenches, and any other equipment outlined in the manual. Additionally, verify that the appropriate utilities—such as water, gas, and electricity—are accessible and compatible with the new appliance.
APPLIANCE REPAIR in California — fast, reliable, and affordable service that brings your home appliances back to life. Get expert help today and enjoy worry-free comfort!